vTiger 5.4
vTiger 5.4
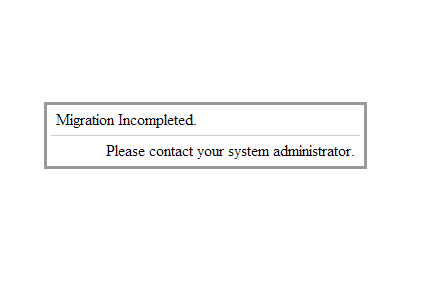
Migration Incompleted. Please contact your system administrator.
August 28, 2013
Article
The vTiger error “Migration Incompleted. Please contact your system administrator.” is usually caused by vTiger not being able to connect to the MySQL database. Possible causes: MySQL Server is not available/down MySQL Server host has changed MySQL Username/Password is not correct/has changed MySQL Database name has changed In order to adjust the MySQL credentials, first you have to verify them with your host provider and adjust them in config.inc.php. Go to your vTigerCRM directory Open “config.inc.php” with your favorite text editor Go to line 47 – verify that the $dbconfig[‘db_server’] has the correct MySQL Host Name Go to line 48 – verify that the $dbconfig[‘db_port’] has the correct MySQL Port Go to line 49 – verify that the $dbconfig[‘db_username’] has the correct MySQL Username Go to line 50 – verify that the $dbconfig[‘db_password’] has the correct MySQL Password Go to line 51 – verify that the $dbconfig[‘db_name’] has the correct MySQL Database Name Hope that helps!
Sorry! Attempt to access restricted file.
August 28, 2013
Article
The most likely cause for the vTiger error “Sorry! Attempt to access restricted file.” is the $root_directory value in the ‘config.inc.php’ is incorrect or misspelled. In order to correct it follow the steps below: Go to your vTigerCRM directory Open “config.inc.php” with your favorite text editor Go to line 86 and adjust $root_directory value to correct vTiger directory. Note, that the directory must end with /. It should look something like this – $root_directory = ‘/var/www/vtigercrm/’; Hope that helps!
Mail could not be sent to the admin user. Please check the admin emailid/Server settings
August 7, 2013
Article
There are a lot of things that can go wrong when setting up the vTiger Outgoing Email Server – it can be as simple as mistype or as complected as firewall blocking the connection or missing PHP extension. Hopefully the steps below will point you to the right direction while troubleshooting the error you are getting. If you are using GMail as your Outgoing Server – follow the guide “Setting up vTiger Outgoing Email Server With GMail“ Make sure that the username/password and the Server Name is correct. Check your email settings or contact your email provider to verify the email server. Verify that your email server does not require SSL connection or any specific port – if it does, add the ssl:// tag or the port using the “GMail as an Outgoing Email Server in vTiger” example. If you are using ssl:// tag – make sure SSL PHP Extension
Setting up vTiger Outgoing Email Server With GMail
August 7, 2013
Article
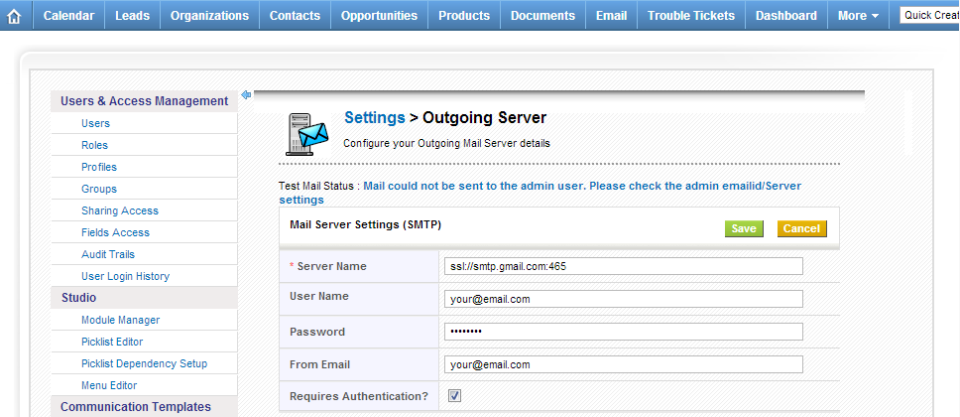
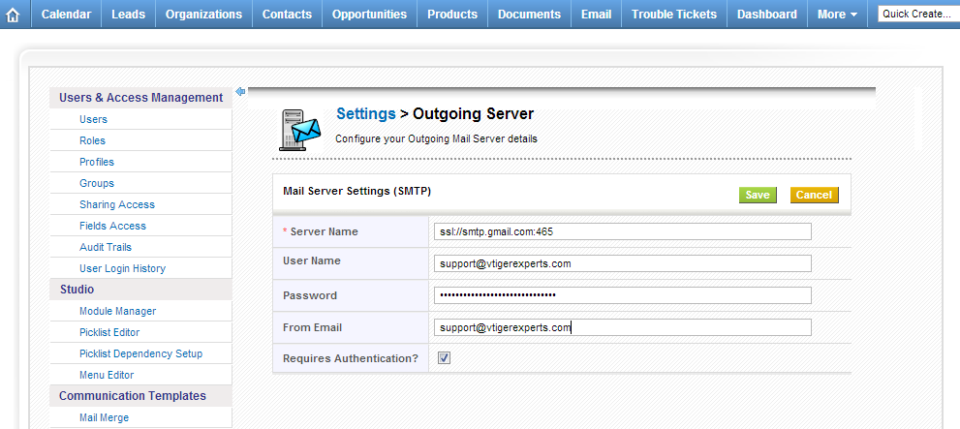
Setting up vTiger Outgoing Email Server is easy – if you know how to the details required. Most of the Outgoing Email servers do not require SSL connection or any specific port, however GMail does. In order to setup GMail as an Outgoing Email Server for vTiger – you have to specify the PORT and that it’s authenticating using secure certificate. Here’s the syntax: Server Name: ssl://smtp.gmail.com:465 Username: Your@email.com Password: Your Email Password Requires Authentication: Yes From Email: Your@email.com Note, that it does work the same for GMail and Google Apps Accounts. If you are getting a message “Mail could not be sent to the admin user. Please check the admin emailid/Server settings” – use the troubleshooting steps in this article.
How to set default value for vTiger field?
July 26, 2013
Article
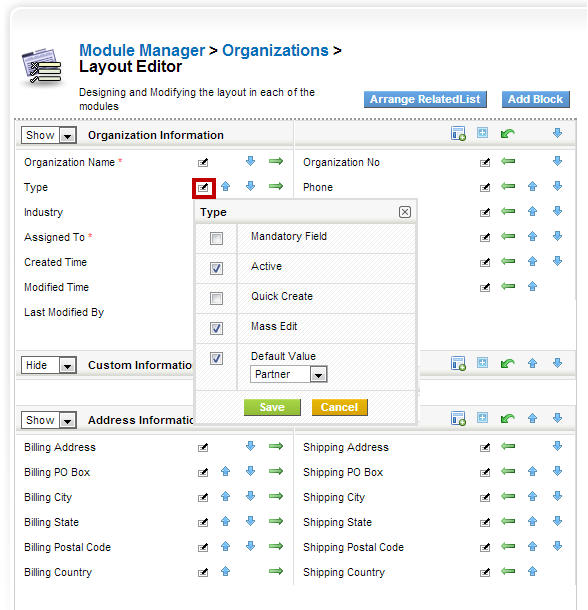
vTiger 5.4 introduced an option to select the default value for most of the fields. To do so, do: Mouse over the “gear” icon on the right upper corner Click “CRM Settings” Under “Studio” section, hit “Module Manager” Click on the wrench(far right side) next to the module you want to add custom field. Click “Layout Editor” Find the field you want to set default value for, click on “Note with a Pen” next to the field. Select the Default value, hit save. Now every time you create a record, it will default to the value selected. If you are on vTiger 5.3 or lower you will not be able to set default values using this method.
Invoice/Quote/Sales Order Default to Service instead of Product.
July 18, 2013
Article
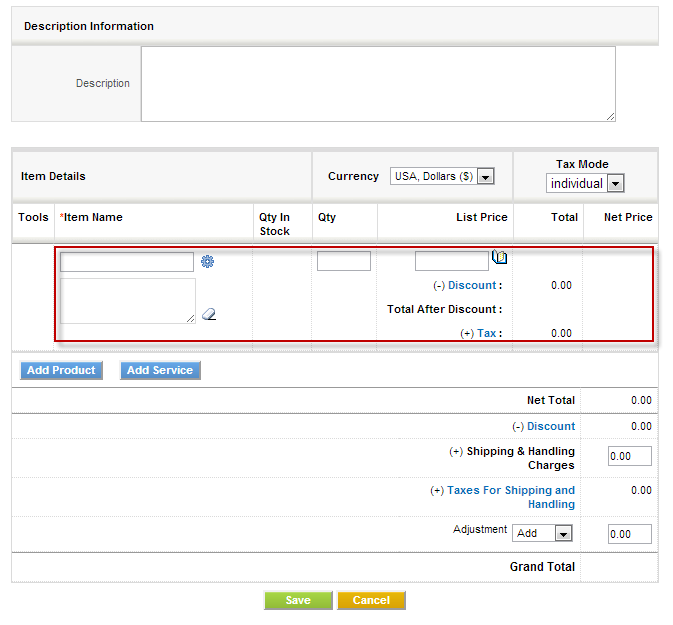
By default when you start Invoice, Quote or Sales Order the item defaults to products. This is not convenient for businesses who are oriented towards services, however there’s a quick tip how to change the first line item to services. We strongly recommend to backup vTiger files and database before doing any changes to code/database. Navigate to “vtigercrm/Smarty/templates/Inventory/ProductDetails.tpl” Go to line 172, the line should be: <img id=”searchIcon1″ title=”Products” src=”{‘products.gif‘|@vtiger_imageurl:$THEME}” style=”cursor: pointer;” align=”absmiddle” onclick=”productPickList(this,’{$MODULE}’,1)” /> Change it to: <img id=”searchIcon1″ title=”Services” src=”{‘services.gif‘|@vtiger_imageurl:$THEME}” style=”cursor: pointer;” align=”absmiddle” onclick=”servicePickList(this,’{$MODULE}’,1)” /> Save files and you are set.
vTiger 5.4.0 Security Patch Released
March 26, 2013
Article
vTiger team has released a security patch which will help prevent the Local File Inclusion, Local File Deletion, SQL Injection, PHP Code Injection, Cross site scripting, Arbitrary File Upload, Authentication Bypass vulnerabilities(SOAP API’s). You can download the patch from SourceForge or Office vTiger Link. Make sure you always backup your files and the database. To apply the security patch, simply overwrite the files in /vtigercrm/ directory. Feel free to contact us if you need help apply the patch.


Activate or Deactivate Comments Section/Block in VTigerCRM