vTiger Tips
Document Designer New Feature: Create NEW Records Utilizing Forms
December 30, 2017
Article
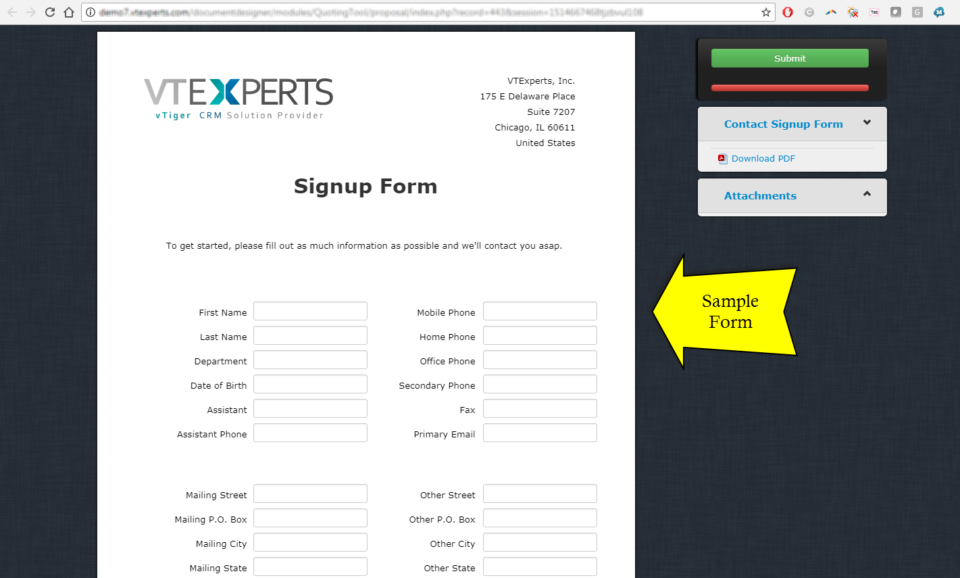
We’ve recently added new feature to our document designer, which allows to create new records in VTiger. It’s very similar to how our update functionality works (If you are familiar). The idea is that user will create a document/form that can be sent to a customer or any other email or even placed online i.e your website and when the form gets filled out – the record will get automatically created in VTiger. It’s similar to webform functionality, however it’s more powerful that that, because it supports all standard and custom modules as well as links back new record to parent record e.g organization (if configured/sent properly). Simple Example: create custom form and place it on your website for new signups (lead/contact information will flow directly into VTiger). Advanced Example: create custom form that you can send to your customers for tickets/support requests, data gathering. The form can be created
Change Column Order On Related Modules In VTiger 7
December 30, 2017
Article
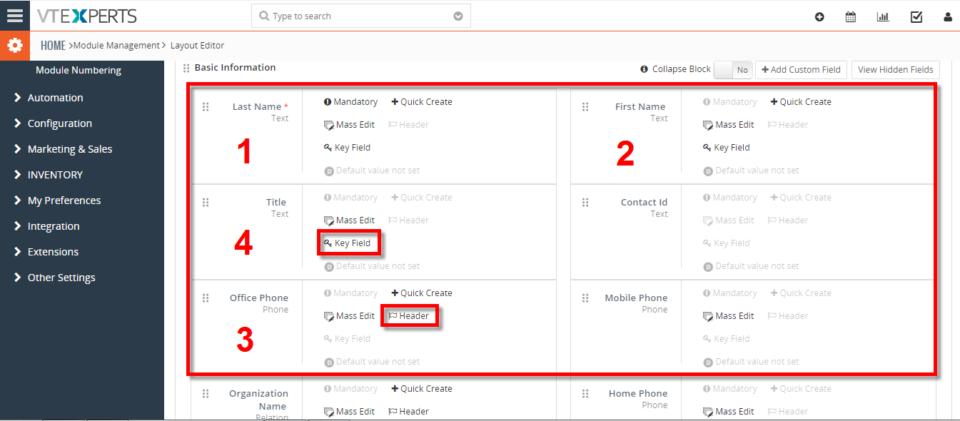
Take a look on how to tailor your module layout by using the “Module Layouts & Fields” settings. Vtiger 7 now provides a variety of ways to change the column order. How to Change Column Order Contacts field columns are set in the same order as shown on “Layout Editor” settings page. Header Fields take precedence over Key Fields and are listed first in the columns field. Summary: The “Header” section and “Key Fields” section are mutually exclusive (the same field detail cannot appear in both sections of the same record) Modules without a summary view don’t have a “Key Fields” section but still use the key field details in the module’s related list For example, the “Assets” module does not have a summary view, so it does not have a “Key Fields” section, but when it appears in a related list, the field details are shown in the column fields
How to enable php-imagick (ImageMagick)
December 19, 2017
Article
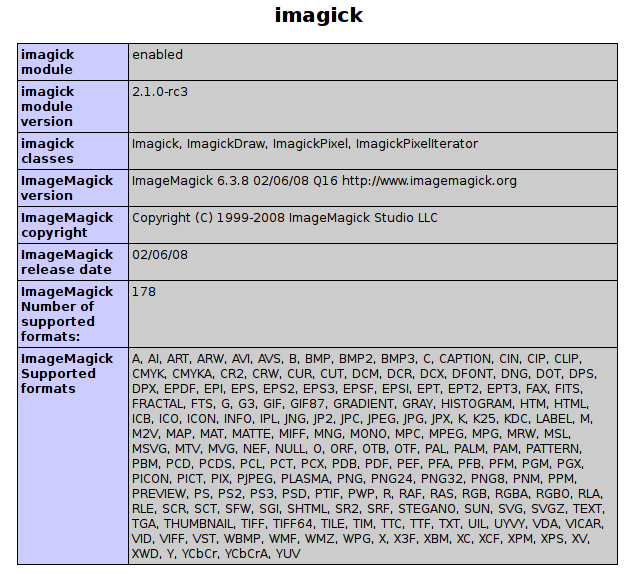
php-imagick (ImageMagick) is a php extension that is required to use our Email Marketing plugin for VTiger. In most cases, it will be pre-installed on your server/hosting, however if you spot warning message when creating email templates – you then need to enable/install php-imagick. Dedicated Unix Server If you are server administrator, you will need to log into terminal (SSH) using putty and install imagick. Ubuntu: Run “apt-get install php-imagick” and restart your webserver. Debian: Run “apt-get install php-imagick and restart your webserver. Centos: Run “yum install php-imagick” and restart your webserver. If none of those work – please try google and see what you can come with. Every server is unique and it’s hard to explain in a tutorial that applies to all. Shared Server (Hosting) If your VTiger is hosted at hostgator, godaddy, deamhost, siteground, etc.. shared plan – it is your best bet to either contact
What Are Key Fields And How To Set Them Up In VTiger 7
December 6, 2017
Article
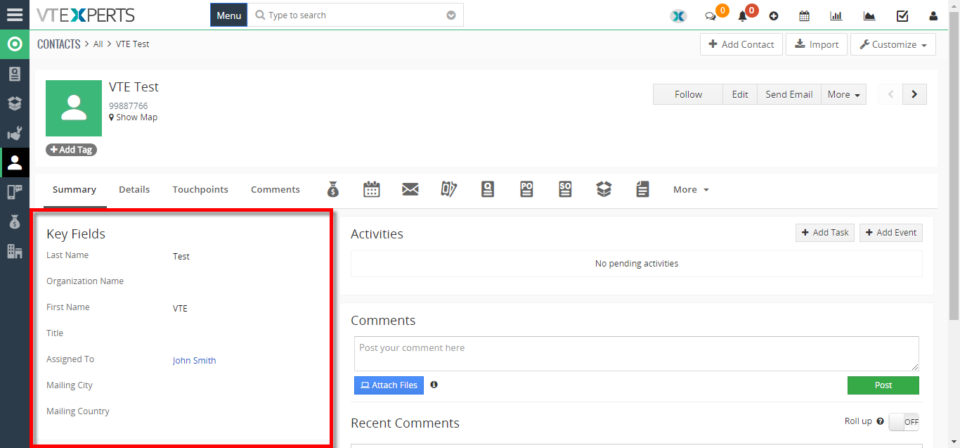
In VTiger 7, Key Fields are shown in the summary view in most module records. This includes the records in Contacts, Organizations, Leads, Opportunities, Quotes, Sales Orders, and more. How to Set Key Fields Go to the “Menu” and click on the “Settings” button and select “CRM Settings“. Under the “Module Management” drop down menu select “Module Layouts & Fields“. From here select the module. Click on the “Key Field” button to Show/Hide them in key field view. For further help contact us on Help@vtexperts.com. We’ll be glad to be of service.
Set Default Field Value In VTiger 7
November 29, 2017
Article
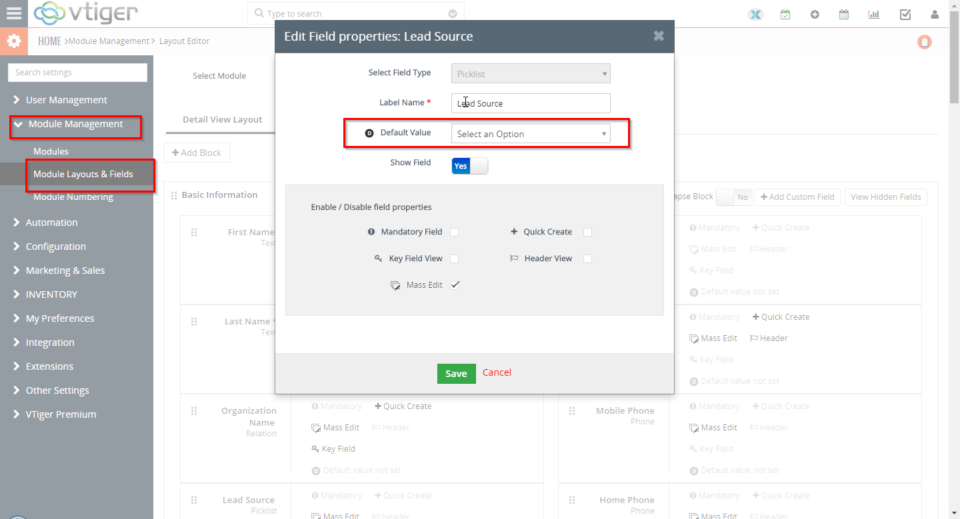
While filling in information records’ fields, there can be some values that you, your users, and your company require the most. That can be a type of a ticket that you create more often than the others, or a sales stage of an opportunity. In VTiger 7, you can configure the default field values. This feature automatically fills the configured fields with the Default Field Values while users can always change the value while entering the data. How to Set Default Field Value Go to the “Menu” and click on the “Settings” button and select “CRM Settings“. Under the “Module Management” drop down menu select “Module Layout and Fields“. From here click on the “Add Custom Field” or “Edit Icon” to set the default field value or change the existing one. Here you can set the Default Field Value in the given space next to the “Default Value“.
Change Record Numbering Sequence Or Prefix In VTiger 7
November 23, 2017
Article
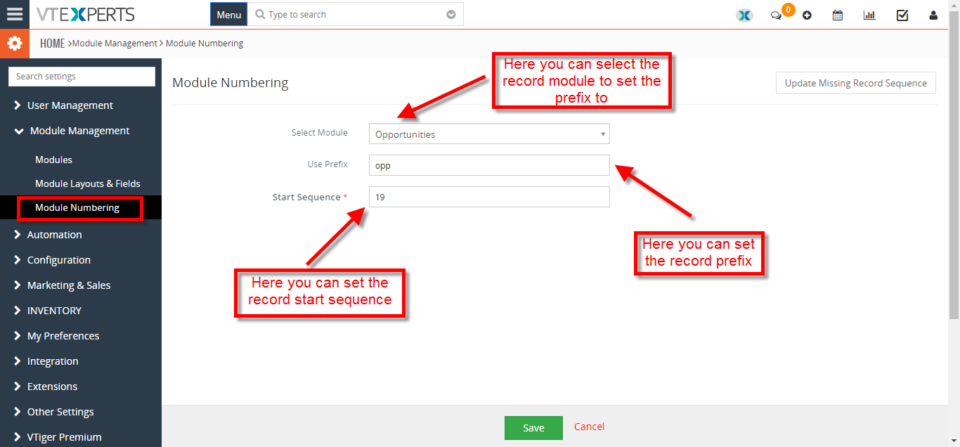
In VTiger 7 user can change the Record numbering sequence and Prefix. This feature help the user to configure the start sequence of the records and set their prefix which help user to mange the records in a very efficient way. How to Change Record Numbering and Prefix Go to the “Menu” and click on the “Settings” button and select “CRM Settings“. Under the “Module Management” drop down menu select “Module Numbering“. From here you can set the Prefix and Start Sequence of the records.
Change Default Landing Page For Calendar To List View in VTiger 7
November 22, 2017
Article
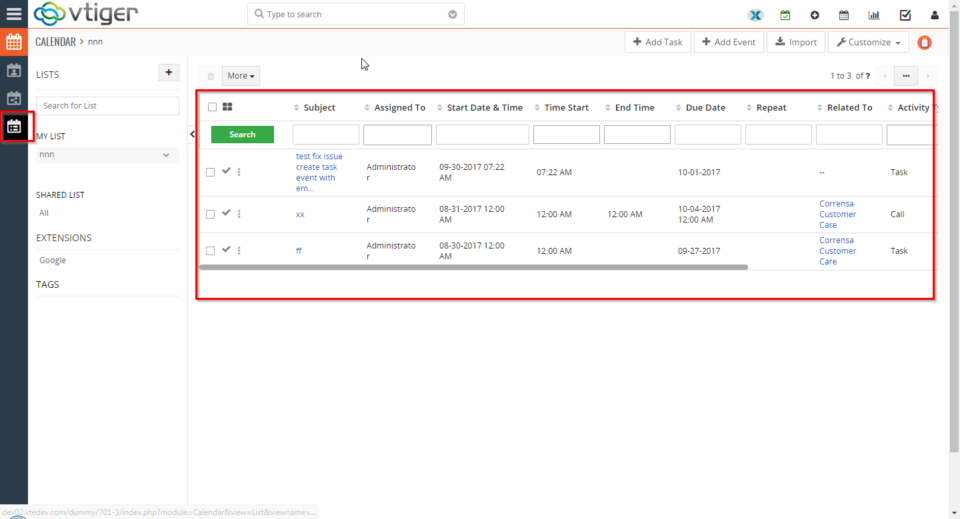
In VTiger 7 user can configure the default landing page for the calendar. This feature help the user to see the current configured view settings every time the user’s open the calendar. How to Change Default Landing Page Go to the “Menu” and click on the “Settings” button and select “CRM Settings“. Under the “My Preference” drop down menu select “Calendar Settings“. From here click on he “Edit Icon” next to the “Default Calendar View“. Here you can select the difference types of calendar view and click on the “Check Mark” button to safe the change’s.
Hide Completed Activities/Events From Calendar View In VTiger 7
November 21, 2017
Article
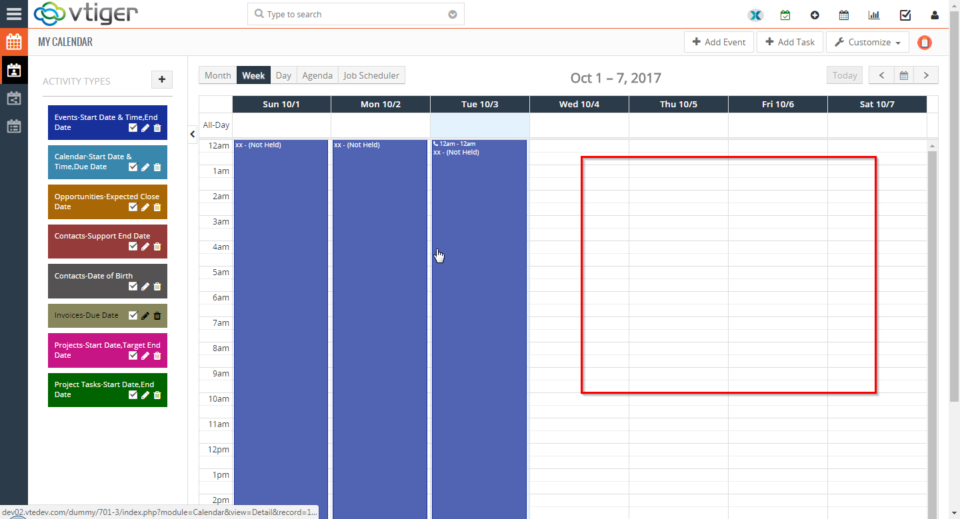
In VTiger 7 user can hide the completed activities/events in the calendar view. This Feature help the user to manage the events in a very efficient way and focus on the upcoming events. How to Hide Completed Activities/Events Go to the “Menu” and click on the “Settings” button and select “CRM Settings“. Under the “My Preference” drop down menu Select “Calendar Settings“. From here click on the “Edit Icon” next to the “Hide Complete Calendar Events“. To hide the the completed events in calendar view “Check The Box” and click on the “Check Mark” button to save the change’s.
Setup VTiger To Start Email In Gmail/Outlook Instead Of Built In VTiger Popup In VTiger 7
November 17, 2017
Article
In VTiger 7 user can configure the Email to be composed in the VTiger composer window or in the default email program e.g outlook/gmail/office365. This feature help the user to compose the email in the desired environment. How to Setup VTiger to Start Email in Gmail/Outlook Go to the “Menu” and click on the “Settings” button and select “CRM Settings“. Under the “My Preference” drop down menu select “My Preference“. From here scroll down to the bottom of the screen and click on the “Edit Icon” next to the “Internal Mail Composer“. “Check” means it will compose the mail in the VTiger window, “Uncheck” mean’s it will open default email program e.g outlook/gmail/office365. Chick on the “Check Mark” to save the change’s.
Change Default View When Opening A Record In VTiger 7
November 16, 2017
Article
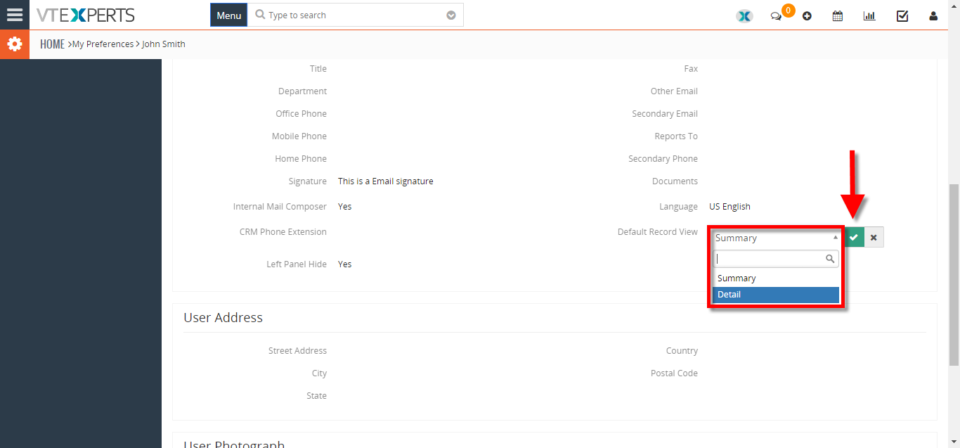
In VTiger 7, users can configure the default view when opening a record. This feature helps to select the default record view to Summary or Detail view. Every time user opens a record, it will show the currently configured view for that record. How to change default view Go to the “Menu” > “Settings“, and select “CRM Settings“. Under “My Preferences” block, select “My Preferences“. From here scroll down to the bottom of the screen and click the “Edit icon” next to the “Default Record View“. Now select the “Detail” view and click on the “Check Mark” to save the change’s.
Change Default Landing Page/Module In VTiger 7
November 16, 2017
Article
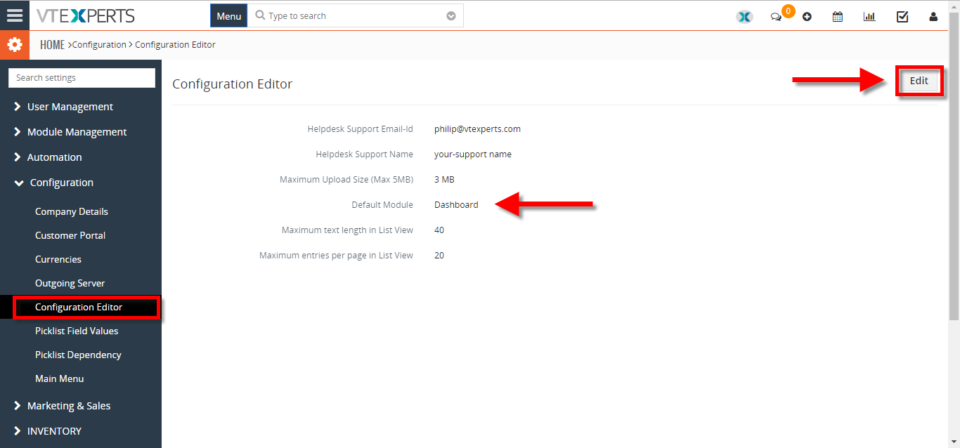
In VTiger 7, users can configure the default page/module to show after logging into the CRM. This feature helps users to directly log onto the most used page/module (which is currently configured by the user) and saves the time of the user. How to Change Default Landing Page/Module Go to the “Menu” > “Settings“, and select “CRM Settings“. Under the “Configuration” block, select “Configuration Editor“. From here click on the “Edit” button on the top right corner of you screen to change the default landing module or page. Click on the “Default Module” field to change the current default landing page/module and select the desired module. Then hit “Save” button to save the changes.
Increase File Upload Size In VTiger 7
November 14, 2017
Article
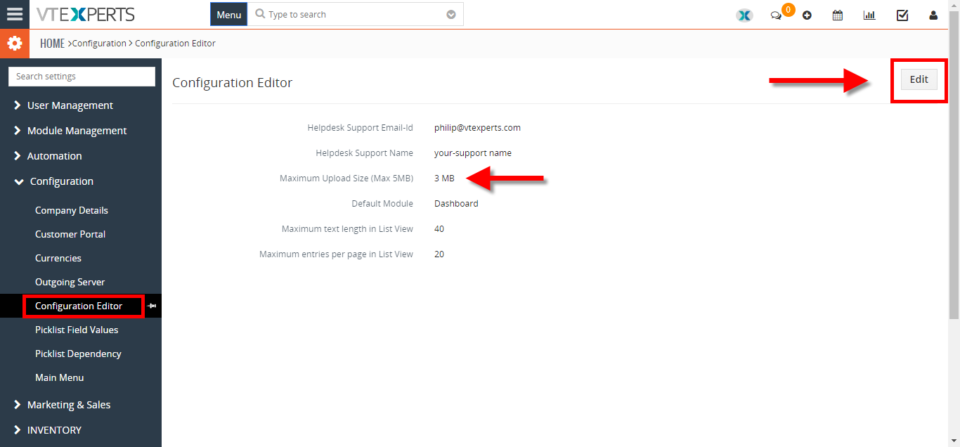
In VTiger 7, you can change the upload file size to Maximum 5MB. Even there’s an option to Bypass The Maximum Size. You can do so by following the steps mentioned below. This will help users to upload bigger files to VTiger. How to Increase File Upload Size Go to the “Menu” > “Settings“, and select “CRM Settings“. Under the “Configuration” section, select “Configuration Editor“. Then click “Edit” button on the top right corner of the screen to change the current values. You can set the upload size value maximum to 5MB and click on the “Save” button. To bypass the 5 MB limit, you will have to modify config.inc.php value. This requires connecting to your VTiger service via FTP or Cpanel, locating the file (should be in your vtigercrm directory) and adjusting the max_upload_size value. Note: in some cases it’s a server restriction, so you might need to adjust your php.ini to allow larger files or
Automatically Collapse Blocks On Detail View In VTiger 7
November 13, 2017
Article
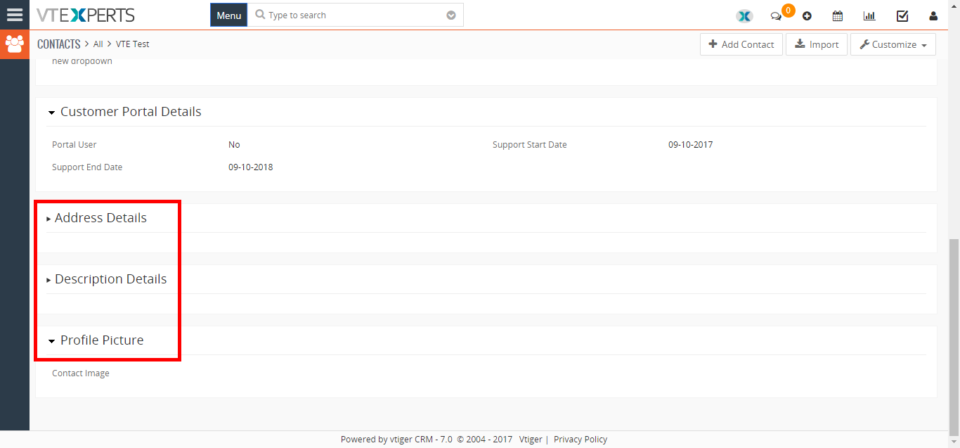
In Vtiger 7, users can set the blocks to automatically collapse in the detailed view. This feature helps users to configure which information block they want to see more and which they use occasionally and keep them hidden by default. How to Automatically Collapse Blocks Go to the “Menu“, “Settings“, and select “CRM Settings“ Under the “Module Management” block, select “Module Layout and Fields“. From here click on the “Select Module” to select the module. Here you can set the the block to collapse on the detail view by clicking on the “Yes/No Switch“. You can see that the block are collapsed in the detailed view.
Where To Setup Email Signature In VTiger 7
October 26, 2017
Article
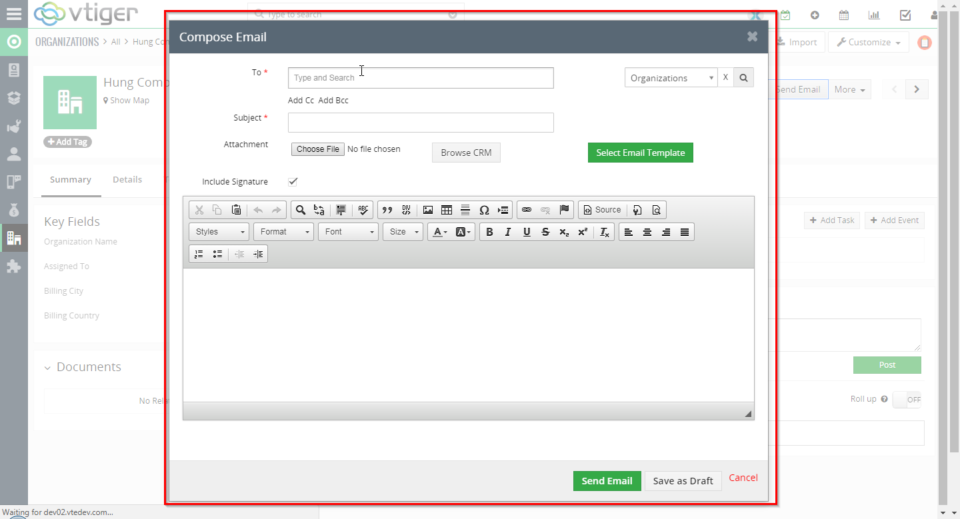
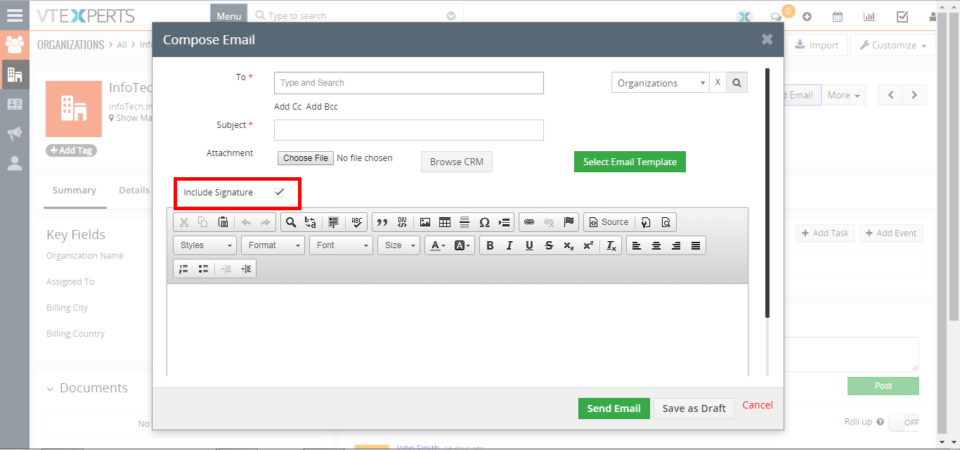
Want to setup Email Signatures one time (just like a template) and use as many times. This feature helps to simply adding the signature in the emails while sending the emails from VTiger. By configuring the signatures one-time, there is no need to submit them in every email being sent. Also, the signatures can be added to every email going out. How to Setup Email Signature To setup Email Signature click on the “User Profile” and select “My Preferences“ Enter the Signature in the “Signature” field and click on the “Tick Mark” to save them. While composing an email, check the the “Include Signature” checkbox to add the signature in the email. Now when the email is sent, it will include the signatures which you configured in the user preferences. For further help, contact us on help@vtexperts.com we’ll be glad to be of service.
Edit Fields From Listview In VTiger 7
October 25, 2017
Article
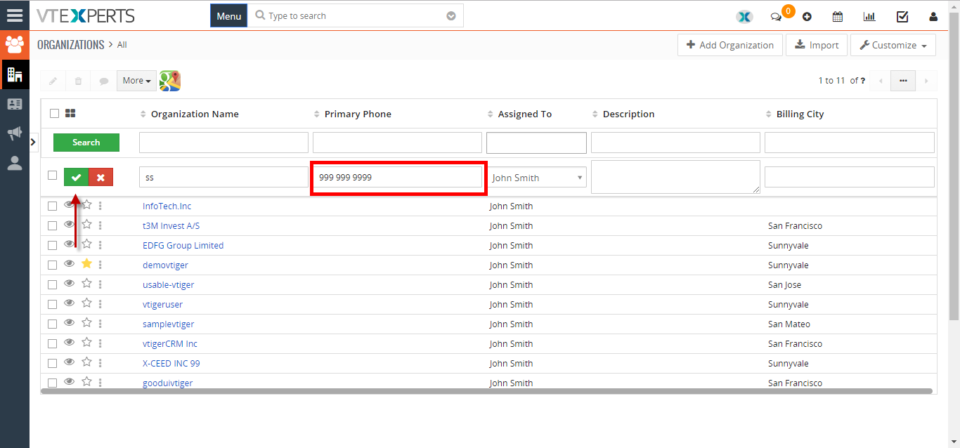
In VTiger 7, users can edit fields right from the listview in any record. This feature saves the time that would otherwise be spent in opening the record and then editing the field. Users can simply add or change the data of a record on the list view. How to Edit Fields on the Listview To edit fields on the listview: Double click on the field of specific record you want to edit. Add the data in the field and click on the “Tick Mark” to save the changes. And the desired info will be added to that record’s field without having the need to open the record For further help, contact us on help@vtexperts.com we’ll be glad to be of service.
Quickly Update List Columns In VTiger 7
October 24, 2017
Article
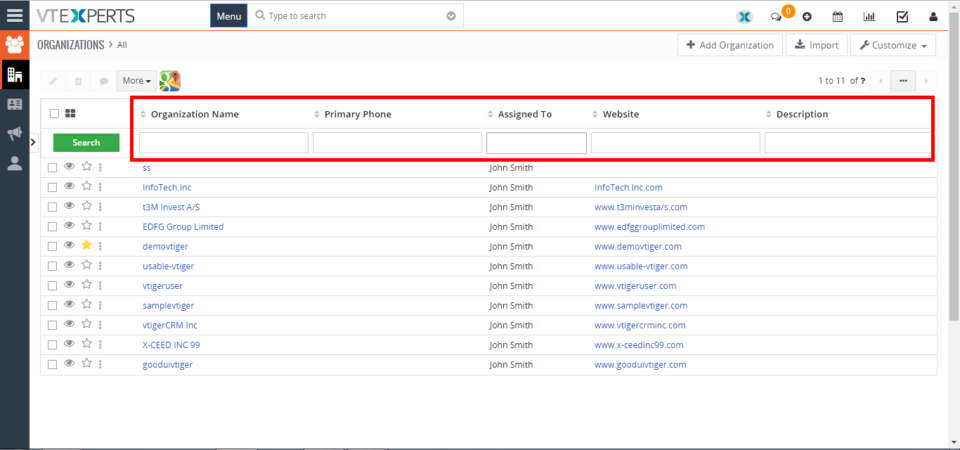
VTiger 7 allows you to add, remove and rearrange the list columns. This feature helps user to add, remove and rearrange the list columns of more than 1 records by selecting them. How To Quickly Update List Columns Select the desired records and click on the “Manage list columns” button to update the columns list. You can rearrange the columns by drag and drop and also add and remove columns. Click on the “Update List” button to save the changes It will change the Columns list according to the new settings. For further help, contact us on help@vtexperts.com we’ll be glad to be of service.
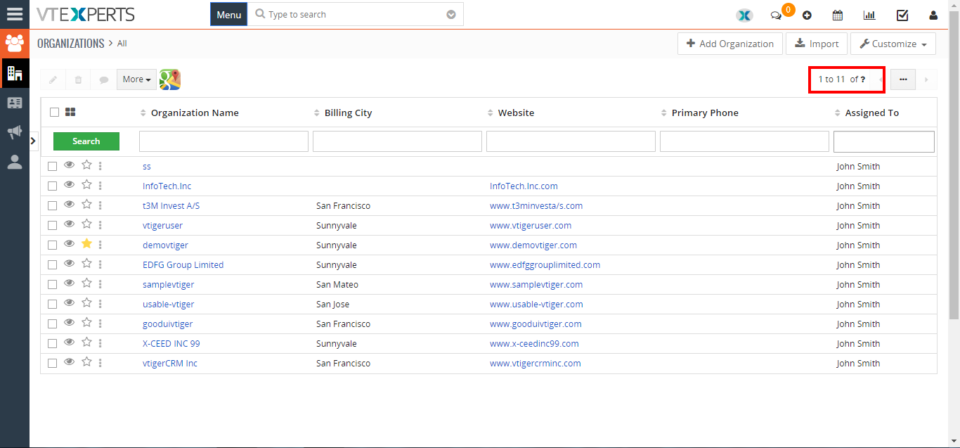
Increase the Number of Records Shown on the List View In VTiger 7
October 13, 2017
Article
Take a look on how you can modify the number of records to show in the list view. This feature helps you to adjust the number of records to be shown on a single page according to your requirements. You can increase or decrease the number of records shown on the list view. How to Increase the Number of Records Shown in the List View You can see how many records are currently shown on a single page To increase the number of shown records click on the “Menu” button and select “CRM Settings“. Under the “Configuration” select “Configuration Editor“, and click on the “Edit” button to change the current number of shown records. Enter the desired number on the given space and click on the “SAVE” button to change the current number of shown records. For further help, contact us on help@vtexperts.com we’ll be glad to be of service.
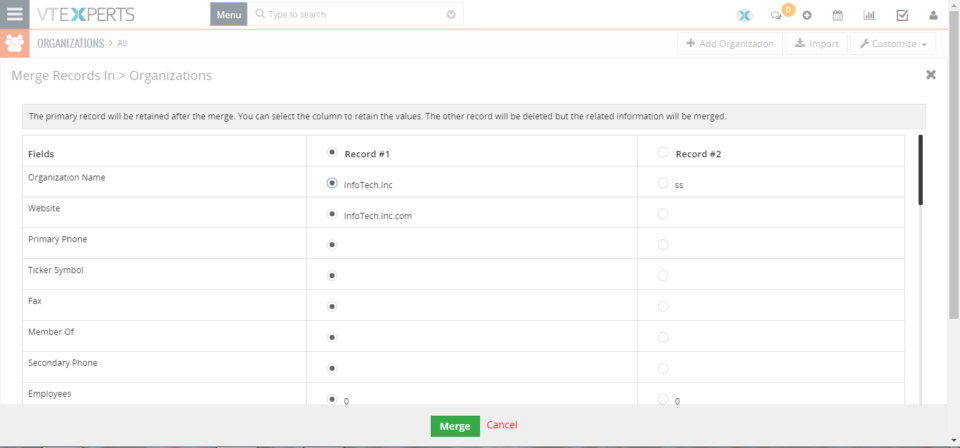
Merge Duplicate Records from List View in VTiger 7
October 12, 2017
Article
Dealing with dulpicates in every CRM is a headache. VTiger 7 allows you to merge the duplicates in very easy way. This feature allows you to merge 2 or more then 2 records into one single record – right from list view. It merges the 2 record fields into one. You can keep the desired record field accordingly. The purpose is to avoid the long list of duplicate records and keep only one record of similar data. How to Merge the Duplicate Records Select the desired records you want to merge and click on the “MORE” button. Click on the “Merge Selected Records“ Select the fields you want to keep and rest will be deleted or merged if they are same. And click on the “Merge” button to merge the selected records. In addition, there’s an extension that is more advanced. With VTiger Duplicate Check and Merge, you can avoid
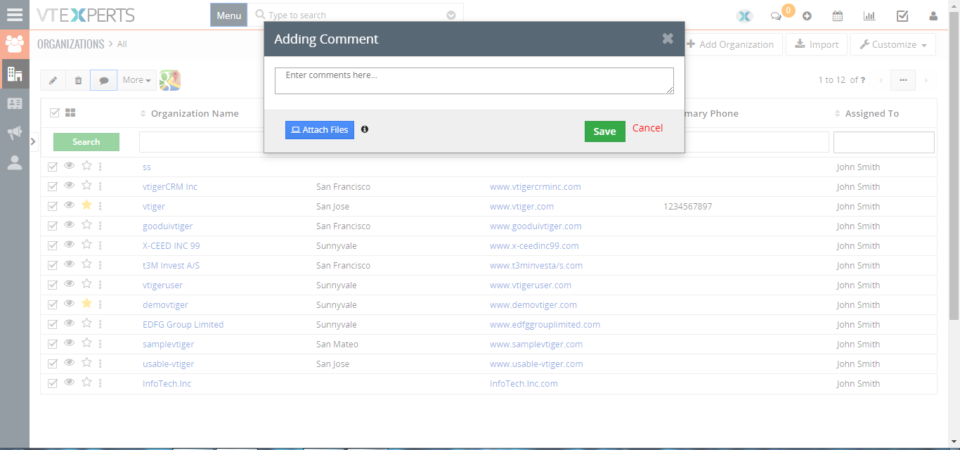
How to Mass Add Comments From List View in Vtiger 7
October 10, 2017
Article
You can add mass comments from list view in VTiger 7. This feature allows to add a comment on multiple records at the same time. The purpose is to avoid the hassle of opening each record and add comments on every single one. How to Add Mass Comments Mark all the records in the list you want to add a mass comment to. Click on the add comment icon to add a comment. Add the comment in the given space and click the save button. The comment will be added to each of the record.
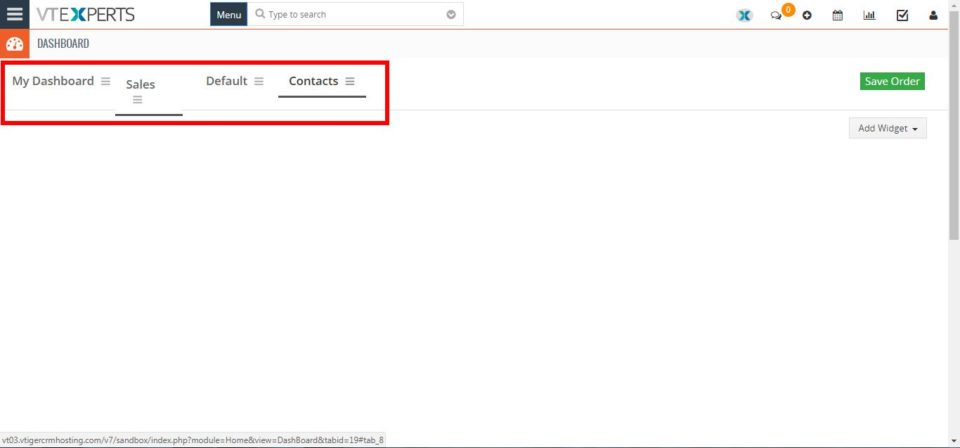
How to Add and Rearrange Dashboards in VTiger 7
October 10, 2017
Article
VTiger 7 allows you to add new dashboards on home screen. The purpose is to add widgets and keep track of important data and processes, such as tickets, opportunities, performance of teams, sales ups and downs and lot more. With dashboards and widgets, you can stay on top of your business and keep checks on the performance. Adding New Dashboard To add a new Dashboard on VTiger 7 homescreen: Click on the “More” dropdown menu button and select “Add new dashboard“. Then add the title of the dashboard in the given space. And click on the save button. Rearranging Dashboard Tabs You can rearrange the added tabs of dashboards. Its quite simple: Click on the “More” dropdown menu button and select “Rearrange Tabs” to rearrange the tabs. Click n hold, and drag n drop the Dashboard on the desired place to rearrange the tabs. Then click
VTiger Tip: How to hide fields based on other field conditions/values?
September 28, 2017
Article
If you are looking to hide field in VTiger based on another field value e.g “Hide Contact.Billing_Country if Contact.Type is “Local Supplier” or any other field – you can do that utilizing Conditional Layouts VTiger Extension, which helps to transform standard VTiger layouts into powerful forms. It only takes few seconds to setup such forms, here are the steps: 1. Open Conditional Layouts Area Go to Menu > Settings > Go to Extension List > Conditional Layouts 2. Hit “+New Conditional Layouts” This is where all conditional layouts that have been setup are shown. 3. Select Module Select any module and name the condition e.g “Hide XXX,AAA,BBB” 4. Add Conditions You can add as many conditions as needed, the action(hide fields), will only be triggered once conditions have been met. 5. Add Tasks This is where all your tasks are,
VTiger 7.0.1 Patch has been released
June 6, 2017
Article
VTiger 7.0.1 GA Release VTiger 7.0 GA (Stable) was released on May 23rd, 2017, however the release had few critical bugs that needed to be addressed right away. On June 6th, 2017 VTiger 7.0.1 patch was released. Here’s the list of issues fixed: #546 – Unable to open the Mail Converter from the menu #554 – Migration errors from V6.5 to V7 #526 – google sync not working #559 – Project Summary Broken #552 – 1st Comment not show in summary #566 – Calendar Issues #517 – pie chart doesn’t have legend In addition to the above, we also have a few minor changes. #551 – Extension banner show also 6.x extensions #493 – change organization associated to opportunity from summary view Latest source code can be downloaded from git or official vtiger website. If you already installed VTiger 7.0 – you will need to go through the
VTiger 7.0 GA (Stable) has been released
May 23, 2017
Article
VTiger 7.0 GA (Stable) Release We are thrilled to announce the release of VTiger 7.0 GA (Stable). New version of VTiger was completely redesigned and has new user interface(theme), which a lot more responsible and user friendly. In addition, it has many new features along with the security updates. To find out more – please see offical vtiger announcement. VTiger 7.0 GA can be downloaded from vtiger.com. Official VTiger 7.0 GA (Stable) Download Link VTiger 7.0 GA interactive demo is available as well, please follow the link below VTiger 7.0 Open Source Live Demo The upgrade patch for VTiger 6.5 to 7.0, has already been released and the instructions can be found below. Step by Step Guide to Upgrade VTiger 6.5 to VTiger 7.0 Our VTiger Extension Pack has been already converted and will work with VTiger 7.0 right away. Note, that not all of the extensions have been
VTiger 7.0 GA Release & Extension Pack (Schedule, Updates & Compatibility)
May 21, 2017
Article
VTiger 7.0 GA Release VTiger 7.0 GA (Stable) has been released May 23rd, 2017. You can download it from vtiger.com or obtain latest code on git. You can find full feature list here. Here’s a VTiger 7.0 introductory/demo video which covers most of the features: https://www.youtube.com/watch?v=4jlhqKQSpP4 Extension Pack Compatibility with VTiger 7.0 Open Source Our team has been working really hard in the past few months to convert most of our extensions to be compatible with VTiger 7.0. We are excited to say, that 95% of our extensions have already been converted and are fully compatible with VTiger 7.0 open source. You can check the status of each as well as see which extensions have been discontinued for one reason or another. VTiger 7.0 Extension Pack Compatibility Chart In addition, our extension pages(on the website) have already been updated and include screenshots/videos/live demos & user guides
Step by Step Guide to Upgrade to VTiger 7.0
May 21, 2017
Article
VTiger 7 upgrade path is very similar to earlier versions. You will need to download the patch, extract it, backup your files/db and run the VTiger 7 migration wizard. This article provides step by step instructions to upgrade to VTiger 7.0. VTiger 7 has a completely redesigned user interface and a lot of new features. If you haven’t had a chance to test drive vtiger 7 – you can play around with our demo. VTiger 7 Open Source Demo Link If you are a ‘do it yourself’ type of person and have enough knowledge about VTiger and its’ upgrade process – you should be able to do it yourself. On the other hand, if you consider your data too valuable to not risk, we at VTiger Experts can execute it for you. Our developers are skilled and highly experienced in upgrading VTiger to the latest version. #1: Creating Backup of


