vtiger7
Map Data From Quote/Invoice/Order To Project In VTiger 7
October 2, 2018
Article
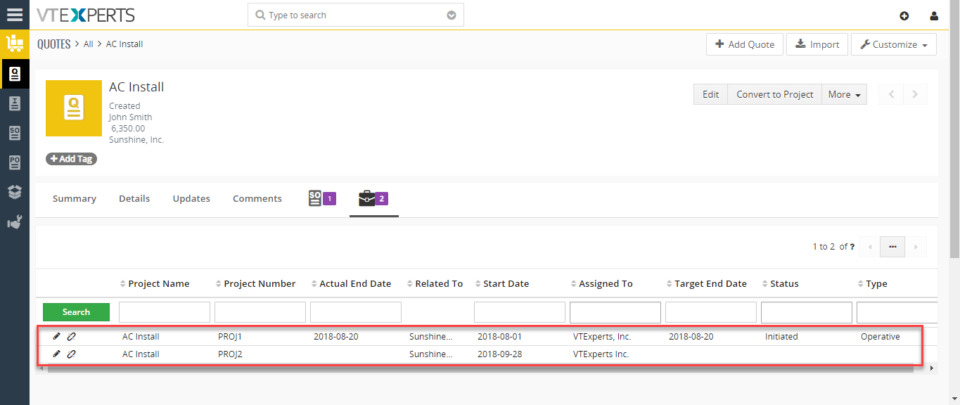
Extension for VTiger designed to convert Quote/Invoice/Order to Project. It comes with intuitive conversion wizard/popup includes: Pre-filled Project Name (with subject), Option to select Project Start/End Date, Option to exclude products/services (by default, all products/services get automatically checked/included), Option to set Project Task Start/End Date When the project gets created, it will automatically create project tasks as well. Each project task will get associated with appropiate service/product. Project will get associated with quote/invoice/order from which it was created. How to Convert Quote/Invoice/Order to Project In quotes, click “Convert Project” button. The project name will be pre filled. You can add the start date. Add Products and Services. Project will be automatically created. You can see the project is associated with the quote. For further help, contact us on help@vtexperts.com. We’ll be glad to be of service.
Change Tile Colors On Kanban View In VTiger 7
October 1, 2018
Article
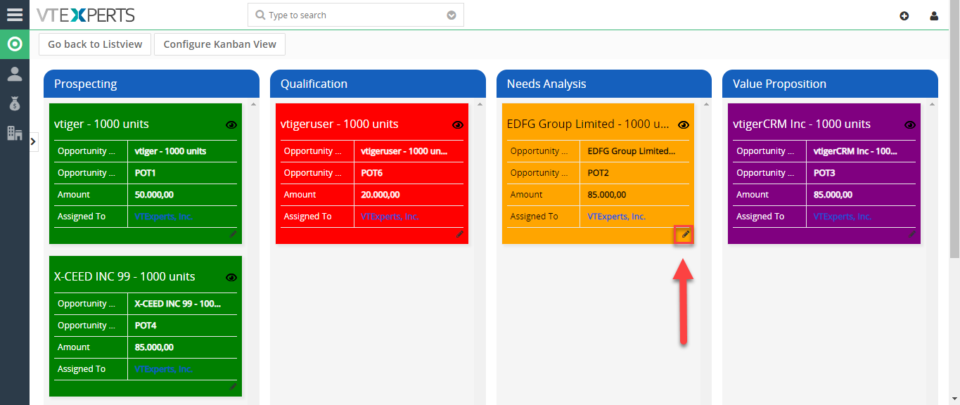
Kanban View is an extension with which you can easily create dynamic “cards” to visualize your workflow. Each module, e.g. Opportunities, Tickets, Tasks, Projects can be configured to have different sets of fields on the card as well as the “grouping/primary field“. Kanban view is mostly used to collaborate with team and manage sales opportunities, tickets, projects, tasks or any other list of records. How to Change Tile Colors For switching to Kanban View in Opportunities click on the Blue Button on the upper right corner of the screen.. Click on the “Edit” icon on the tile. Select the new color. The color is changed. For further help, contact us on help@vtexperts.com. We’ll be glad to be of service.
Can Custom Field Be Checked For Duplicates In VTiger 7
September 28, 2018
Article
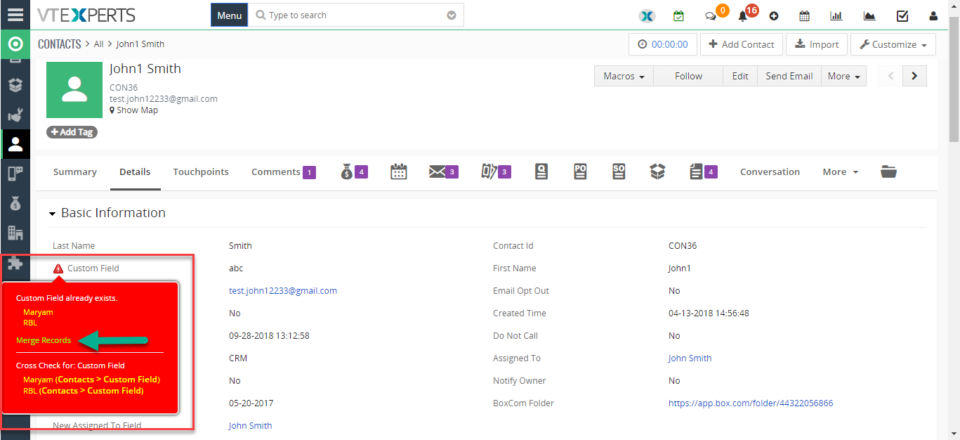
Duplicate Check & Merge is an extraordinarily useful extension for VTiger that is designed to find & merge any existing duplicate records, as well as to prevent any potential duplicates. Compatible with ALL Standard & Custom Modules as well as any Standard & Custom fields which can be configured to work as a ‘duplicate check fields‘, duplicates are checked on every entry point possible including Quick Create, Summary View, Detail View, Create & Edit Views. It eliminates any possibility of errors. How to Check Custom Fields Go to Menu > Settings > CRM Settings > Extension Pack > Duplicate Check and Merge. Click on the “Add new field” in the related module block. Add the custom field. You can also cross check this custom field. Click “Save” button. In record detailed view. Click “Warning Icon“. Click Merge. You can see the Contact is merged with the new contact. For further help, contact us on help@vtexperts.com. We’ll be glad to be of service.
Update Price Or Quantity Before The Item Is Added To Quote Or Invoice In VTiger 7
September 27, 2018
Article
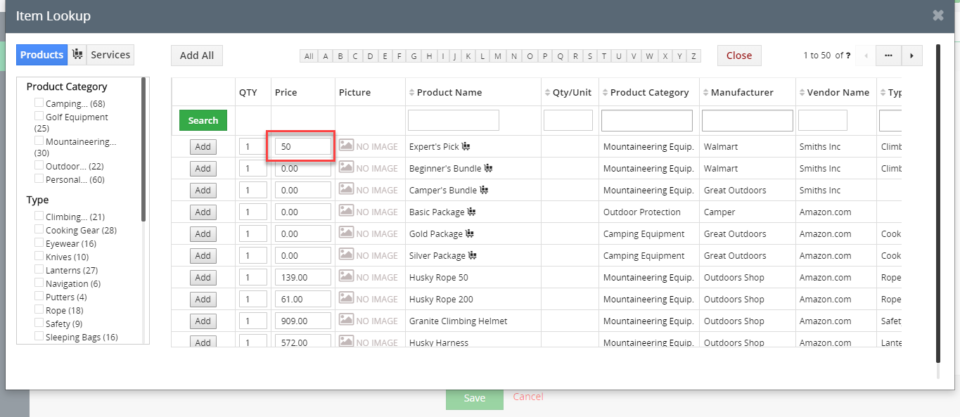
Easy Item Lookup Extension for VTiger was designed to significantly increase the efficiency when adding products & services to the invoices/quotes/sales & purchase orders. We applied a method that is very similar to any online shop, where you select your category and items reload based on the category selected. It supports up to 3 “category” fields, meaning, that you can narrow down your search by any picklist field on product/service (category, sub category, manufacturer, type, etc..). It also supports filter by vendor, which works exactly as the category filter. How to Update Price In the Item Lookup popup you can Edit the price. This price gets updated to the invoice/quotes/SO/PO immediately. For further help, contact us on help@vtexperts.com. We’ll be glad to be of service.
Convert Quote To Project In VTiger 7
September 26, 2018
Article
Extension for VTiger designed to convert Quote/Invoice/Order to Project. It comes with intuitive conversion wizard/popup includes: Pre-filled Project Name (with subject), Option to select Project Start/End Date, Option to exclude products/services (by default, all products/services get automatically checked/included), Option to set Project Task Start/End Date When the project gets created, it will automatically create project tasks as well. Each project task will get associated with appropiate service/product. Project will get associated with quote/invoice/order from which it was created. How to Convert Quote to Project In quotes, click “Convert Project” button. The project name will be pre filled. You can add the start date. Add Products and Services. Project will be automatically created. You can see the project is associated with the quote. For further help, contact us on help@vtexperts.com. We’ll be glad to be of service.
Display Product Picture When Searching Items In VTiger 7
September 25, 2018
Article
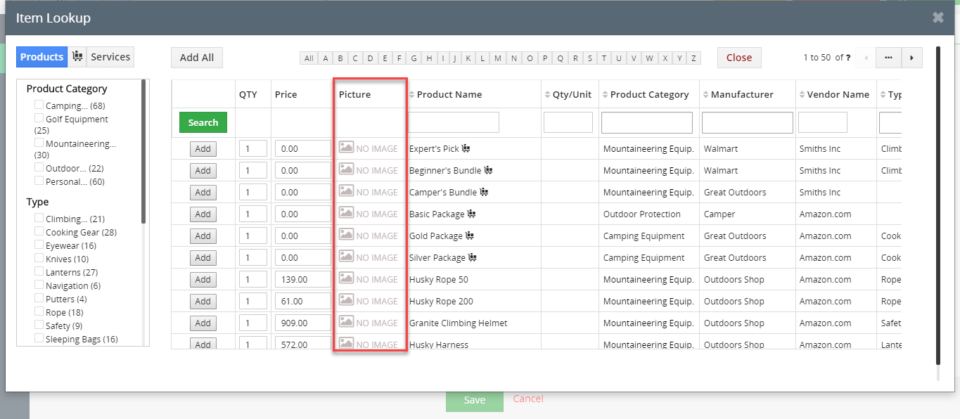
Easy Item Lookup Extension for VTiger was designed to significantly increase the efficiency when adding products & services to the invoices/quotes/sales & purchase orders. We applied a method that is very similar to any online shop, where you select your category and items reload based on the category selected. It supports up to 3 “category” fields, meaning, that you can narrow down your search by any picklist field on product/service (category, sub category, manufacturer, type, etc..). It also supports filter by vendor, which works exactly as the category filter. How to Display Product Picture Go to Menu > Settings > CRM Settings > Extension Pack > Item Lookup. Turn on the Picture column. You can also specify the size of the picture. Now you can see the Picture column in the Item Lookup popup. For further help, contact us on help@vtexperts.com. We’ll be glad to be of service.
See Deleted Record Logs By User Date In VTiger 7
September 21, 2018
Article
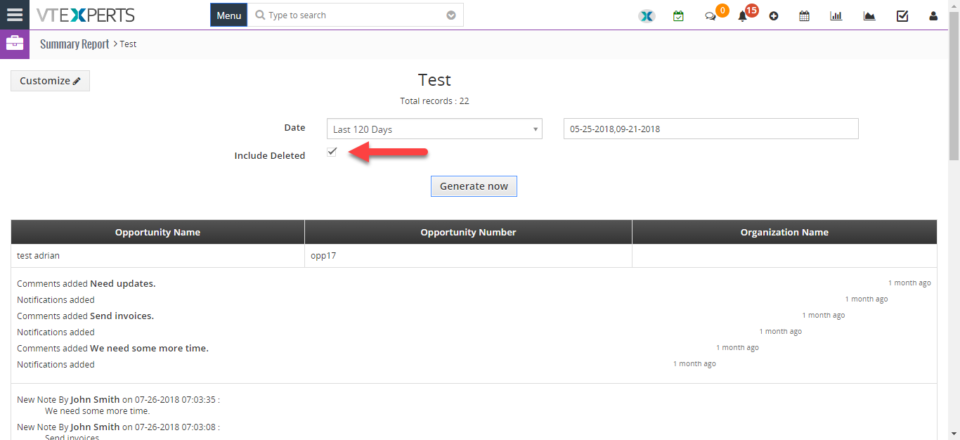
User Summary Report extension is designed to allow the system admin to see activity on certain records or list of records. It allows to monitor every created or updated record. How to See Deleted Record Logs Go to the Menu > Projects > Summary Reports. And click on the “Add Report” button. Add report name. Select Module. Select report type. Add fields form the module. Add report description. Add conditions for the report. Check the box “Include Deleted” to see deleted records. Click “Generate Now“. For further help, contact us on help@vtexperts.com. We’ll be glad to be of service.
Convert Invoice To Project In VTiger 7
September 20, 2018
Article
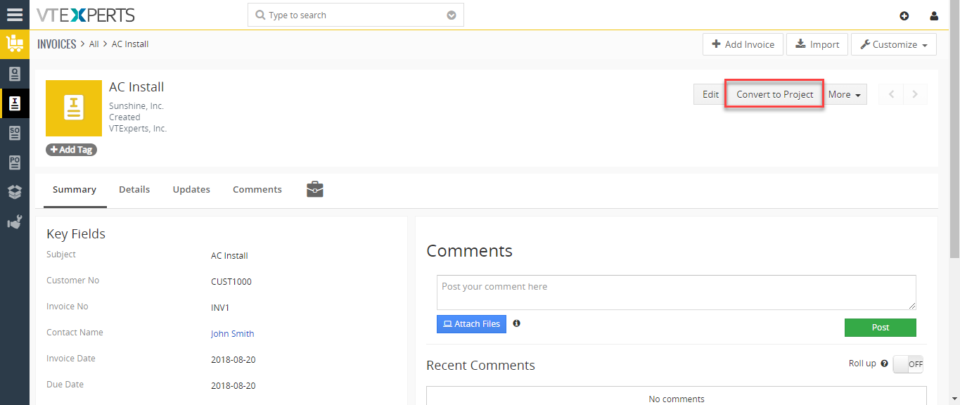
Extension for VTiger designed to convert Quote/Invoice/Order to Project. It comes with intuitive conversion wizard/popup includes: Pre-filled Project Name (with subject), Option to select Project Start/End Date, Option to exclude products/services (by default, all products/services get automatically checked/included), Option to set Project Task Start/End Date When the project gets created, it will automatically create project tasks as well. Each project task will get associated with appropiate service/product. Project will get associated with quote/invoice/order from which it was created. How to Convert Invoice to Project In invoice, click “Convert Project” button. The project name will be pre filled. You can add the start date. Add Products and Services. Once you click save the project will be automatically created. You can see the project is associated with the invoice. For further help, contact us on help@vtexperts.com. We’ll be glad to be of service.
Create Detailed Field Tooltips (Modal Popup) With Tooltip Manager In VTiger 7
September 19, 2018
Article
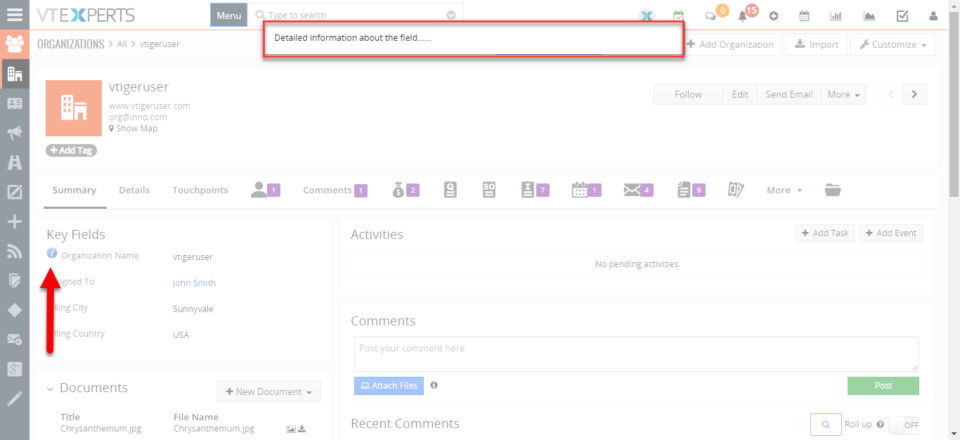
Field Tooltip Manager for VTiger is designed to enable and display helpful field tooltips on VTiger record views. With the intuitive configuration panel you can configure the tooltip to be plain or rich text, as well as include images, bullet points, background and text colors. In addition it is compatible with HTML for more advanced tooltip definitions. It comes with 2 types of previews: Popup (best used for information containing rich text, images and multiple paragraphs) and Tooltip (regular bubbled text). How to Create Detailed Field Tooltips (Modal Popup) Go to the Menu > Settings > CRM Settings > Extension Pack > Tooltip Manager. Select the “Module” and the “Field Name“. You can select a different “Icon” or upload a new one. Select Popup preview. Define the Tooltip content in the Rich Text Area. You can see the Tooltip Icon and when you click the icon it will popup the Tooltip in the record. For further help, contact us on help@vtexperts.com. We’ll be glad to be of service.
Chat (Realtime) With My Staff (VTiger users) In VTiger 7
September 14, 2018
Article
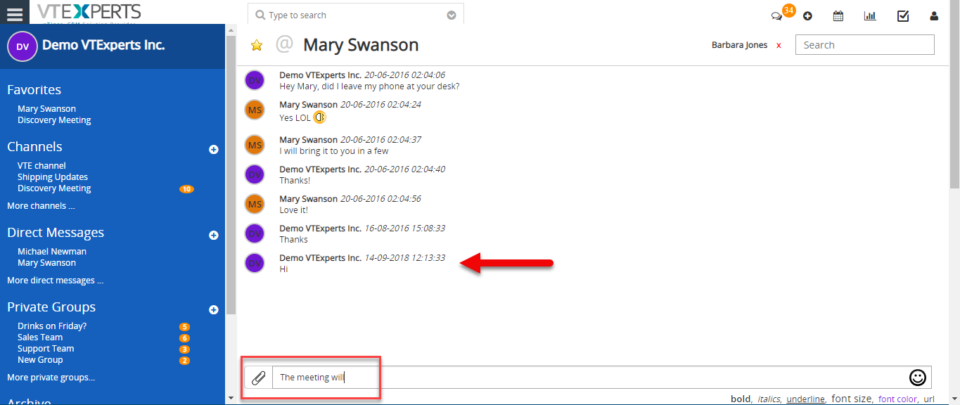
Collaboration Board/Chat tool integrated within VTiger allows users to send direct & private group messages, create public channels/chat rooms and keep track of all the communication within VTiger. It’s a great tool for a team looking to collaborate within VTiger. How to Chat with my Staff Click on the “Chat” button on the top right corner of the screen. Simply type a message and send. Here you can see the sent message. For further help, contact us on help@vtexperts.com. We’ll be glad to be off service.
Add Custom Many-To-Many Relationship In VTiger 7
September 12, 2018
Article
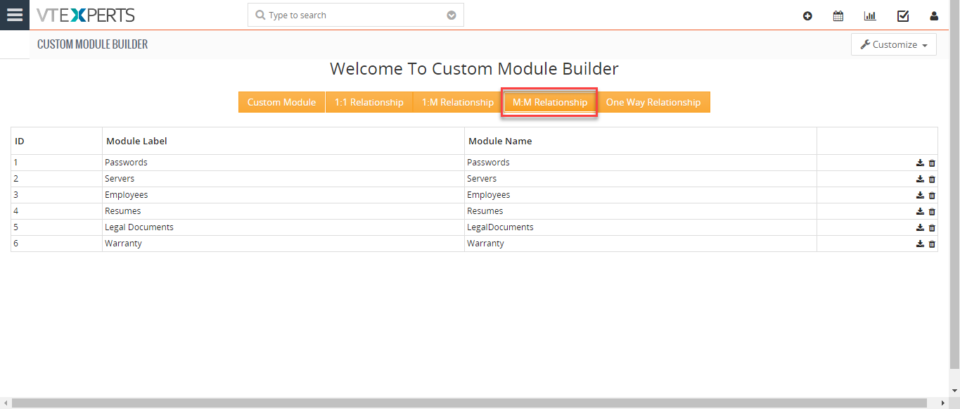
Custom Module & Relationship builder for VTiger is an extension that allows crm administrators to create custom modules within few clicks. All custom modules are created following strict VTiger standards. In addition, the relationship builder allows crm admin to link together existing modules as well as new custom modules. It supports 1:1, 1:M and M:M relationships. How to Custom Add M:M Relationship Go to Menu > Settings > CRM Settings > Extension Pack > Custom Module Builder. Click on “M:M Relationship” button to add a relation. Select one of the modules you want to interlink in the many-to-many relationship. Select the other module you want to link to the first module in a many-to-many relationship. You can see the Tab in the 2nd module that is populated from the 1st module. For further help, contact us on help@vtexperts.com. We’ll be glad to be of service.
Add Custom One-To-Many Relationship In VTiger 7
September 11, 2018
Article
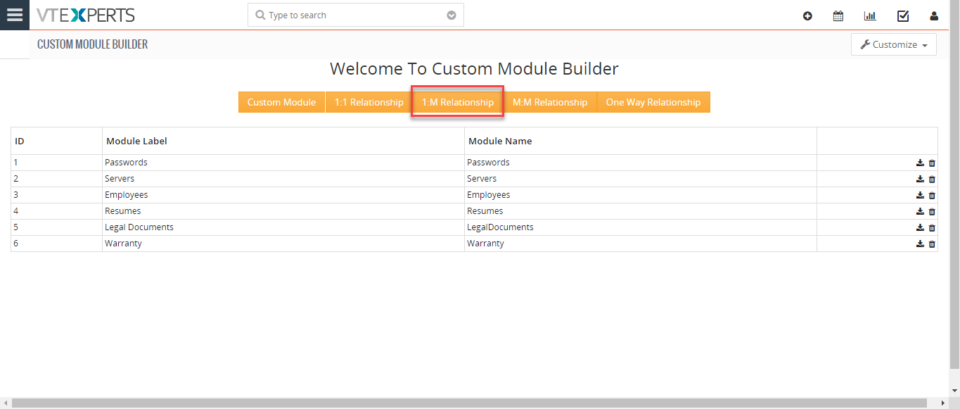
Custom Module & Relationship builder for VTiger is an extension that allows crm administrators to create custom modules within few clicks. All custom modules are created following strict VTiger standards. In addition, the relationship builder allows crm admin to link together existing modules as well as new custom modules. It supports 1:1, 1:M and M:M relationships. How to Add Custom 1:M Relationship Go to Menu > Settings > CRM Settings > Extension Pack > Custom Module Builder. Click on “1:M Relationship” button to add a relation. Select the Primary module you want to link to multiple records of another module. Select the Child/Related module you want to link to the single primary module. Select the block of records from secondary module in which you want the field to be displayed. You can see the information in the Secondary module that is populated form the Primary module. For further help, contact us on help@vtexperts.com. We’ll be glad
Export Lists With Only Columns Selected In VTiger 7
September 7, 2018
Article
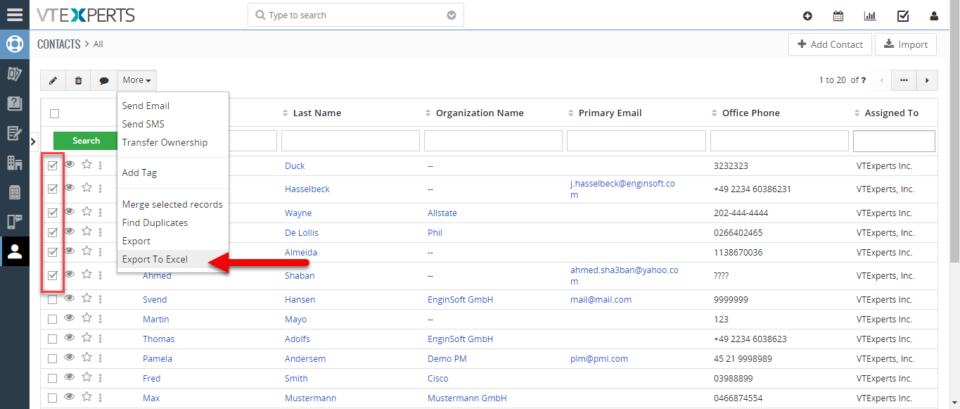
List Export to XLS Extension is designed to make exports from VTiger a little easier. It adds an option to export information from VTiger lists into .XLS (excel), while standard functionality only supports export to .csv, which can be tedious to format. How to Export Lists With Only Columns Go to any list and select the number of records and then click on the “More” button and select “Export to Excel” to create an export into “Excel”. Click “Export selected Records“. It will produce an Excel File which will look like this. For further help, contact us on help@vtexperts.com. We’ll be glad to be of service.
Customize Global Search In VTiger 7
September 6, 2018
Article
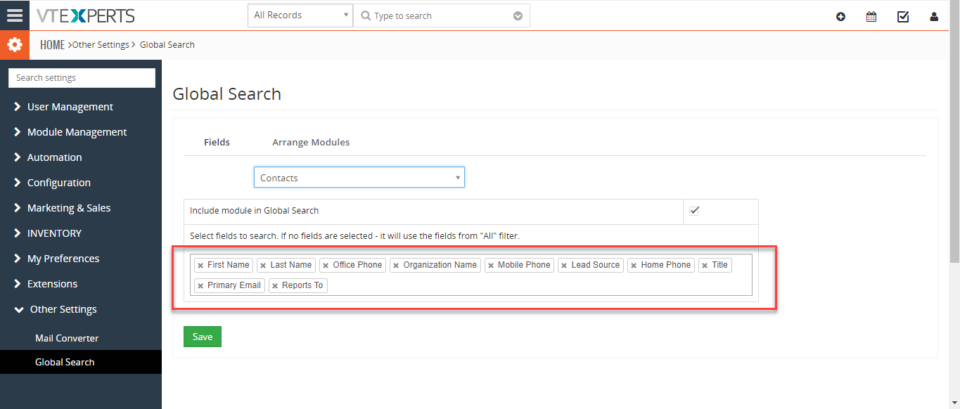
Global Search can search from all the modules and records and it will show all the matching results. This feature helps you to search entire database and give you the results instead while the standard search will only search record name. How to Customize Global Search Go to Menu > Settings > CRM Settings > Extension Pack > Global Search. Select the module. You can include and exclude certain fields from being searched. In arrange section you can actually arrange in which order the search results will show up. For further help, contact us on help@vtexperts.com we’ll be glad to be of service.
Configure VTiger To Lock Users After Number Of Invalid Attempts Of Login
September 5, 2018
Article
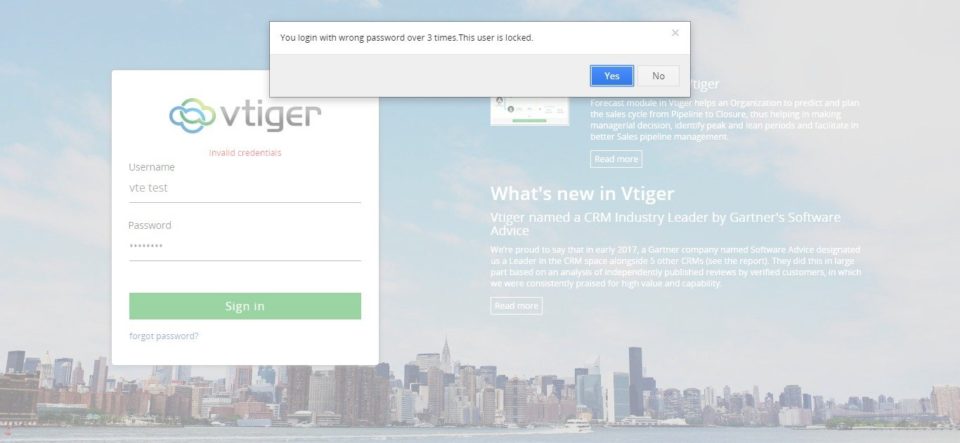
Enhanced Security extension is designed to enforce proper security standards in VTiger. The extension for VTiger also lets system admins enable 2 – Step Authentication as an extra layer of CRM security. Upon configuration, a code is sent to users’ emails, which is required to login. How to Configure VTiger to Lock Users Go to Menu > Settings > CRM Settings > Extension Pack > Enhanced Security. Check the box “Lock user after X incorrect login attempts“. Declare the number of incorrect login attempts limit. After user exceeds the limit of incorrect login attempts, it will be locked. Note: Once a user is locked, only an admin can unlock the user and allow him to log back in. For further help, contact us on help@vtexperts.com. We’ll be glad to be of service.
Assign Records (via round robin) To Online Users Only In VTiger 7
August 10, 2018
Article
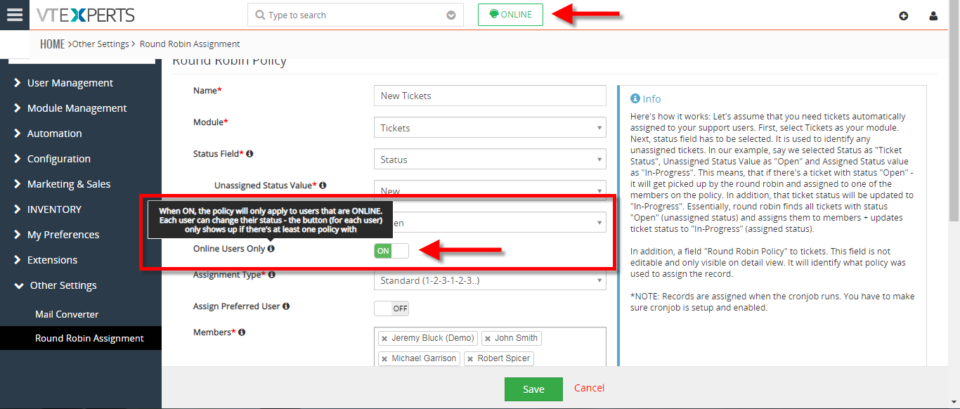
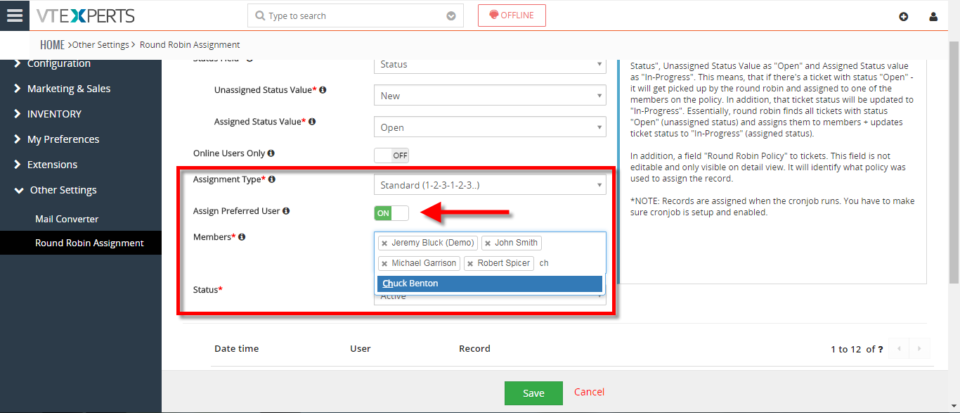
Round Robin Assignment Extension for VTiger was designed to automatically assign users to tickets, leads (or any other module). The assignment is driven based on the condition configured in the policy area. Round Robin Policy configuration consists of a trigger field e.g “Ticket Status”. How to Assign Records to Online Users Go to Menu > Round Robin Assignment. Click on the “New Round Robin Assignment” to create a new round robin rule. Add a name for the Rule. Select the module. Select the status field on which this rule with trigger. Select the unassigned status value. Select the assigned status value. You can enable ticket to get assigned only to online users. Users can switch their Online/Offline status. Select the Assignment type. Standard means each user will get same amount of tickets. You can enable “Assign Preferred User “. Means the ticket can be assigned to preferred users. Select all the users that you like to
Enable Round Robin Assignment In VTiger 7
August 10, 2018
Article
Round Robin Assignment Extension for VTiger was designed to automatically assign users to tickets, leads (or any other module). The assignment is driven based on the condition configured in the policy area. Round Robin Policy configuration consists of a trigger field e.g “Ticket Status”. How to Enable Round Robin Assignment Go to Menu > Round Robin Assignment. Click on the “New Round Robin Assignment” to create a new round robin rule. Add a name for the Rule. Select the module. Select the status field on which this rule with trigger. Select the unassigned status value. Select the assigned status value. Select the Assignment type. Standard means each user will get same amount of tickets. You can enable “Assign Preferred User “. Means the ticket can be assigned to preferred users. Select all the users that you like to be part of this assignment policy. Here is the list of existing assignments. You can see in Ticket list view
Import Users In VTiger 7
August 7, 2018
Article
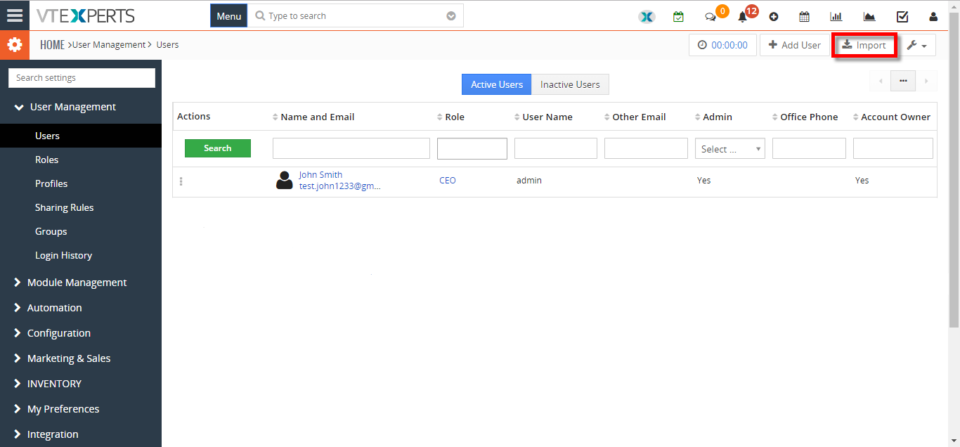
In VTiger 7, admins can Create/Import new users from CSV. file. It is a very easy way to transfer users from one instance to another and save the time for creating all the users from the start. How to Import Users Go to Menu > Settings > CRM Settings > User Management > Users. Click on the “Import” button to import users form CSV. file. Upload the CSV. file and configure field mapping. Here you can see the new users imported from the CSV. file. For further help, contact us on help@vtexperts.com. We’ll be glad to be of service.
Keep Track Of Employees Time In VTiger 7
August 6, 2018
Article
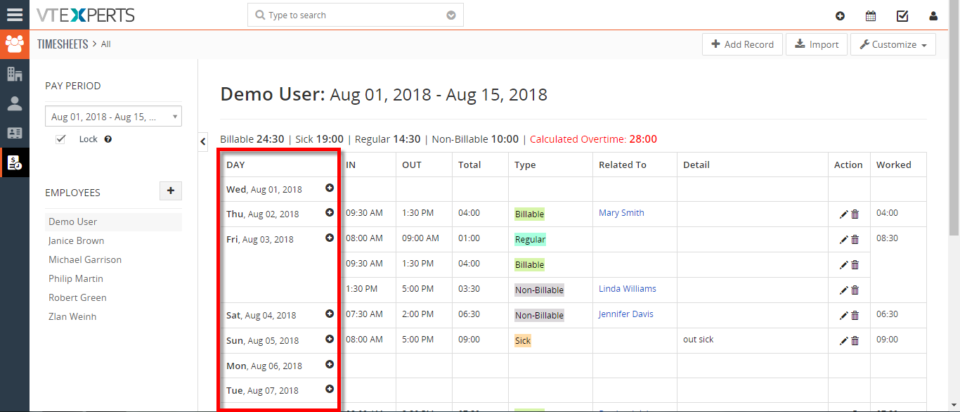
Timesheets is an extension for VTiger designed to elegantly track employee (user) time, with ability to visualize it. It supports custom periods, where you can adjust the length of the period to fit your business. In addition, periods can be locked to prevent any further modifications. It’s simplistic design, makes it extremely easy to log the time and specify the reason, description as well as associate it with an existing record in vtiger. How to Keep Track of Employees Go to Timesheets and click the drop down named as “Pay Period” that gives you the option to select a specific pay period from the list and view the time-logs for it. Select the Employee to open his time logs. Its showing the name of the user for which the time-log is being viewed and the Pay Period selected currently. Here you can see the types of the hours categorized and totaled. This column enlists days for the selected Pay Period. Each row shows a day.
Configuring SLA With A Use Case In VTiger 7
August 3, 2018
Article
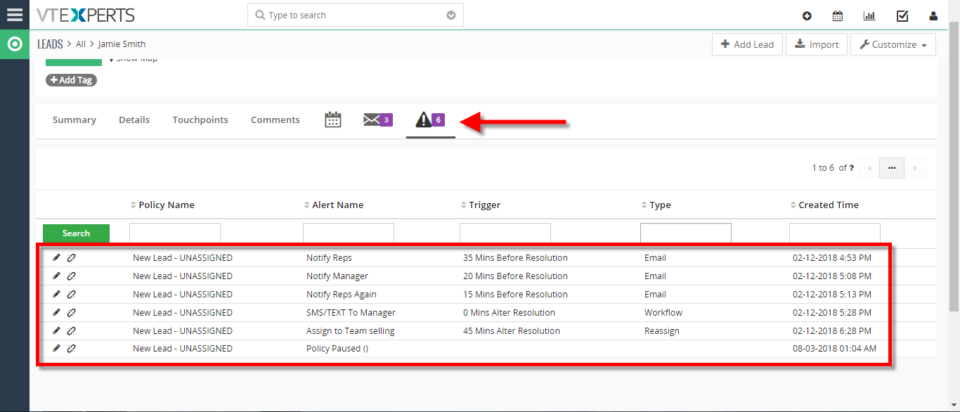
SLA Policy Extension for VTiger was designed to improve response times, accountability, when dealing with time sensitive matters. It’s mostly used in support/helpdesk department, where each ticket/case has to be assigned and worked on/resolved by certain date and time. It allows administrator to create custom SLA Policy rules, which then get automatically applied to a record. Use Case New HOT Lead comes in, if after 45 minutes the lead is still unassigned, you can automatically assign it to a sales rep or notify users/managers + trigger any workflow. How to Configuring SLA With a Use Case Go to Menu > Settings > CRM Settings > Extension Pack > SLA Policies. Click on the “New SLA Policy” button to configure a new policy. Add a Name for the new policy. Select the module you want to apply this policy to. Select the picklist you want to configure for the SLA responses. This will mark the


Print Comments In VTiger 7