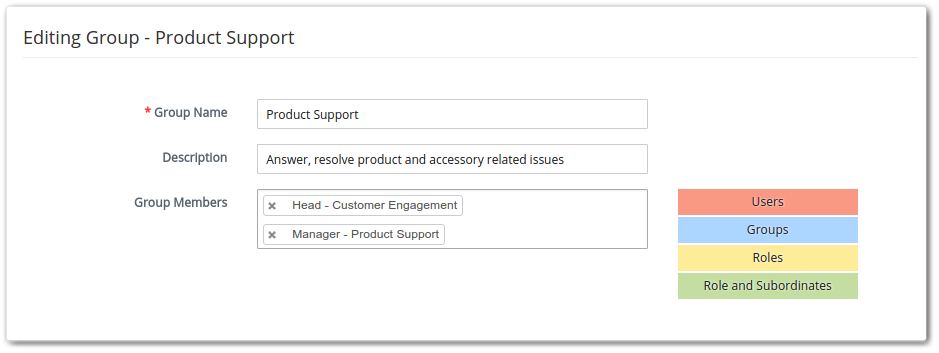
The characteristic that describes the group is the fact it is composed of individuals and groups within the organization. Teams are being built on the structure of a group to which possess a common record. The Vtiger 7 allows you to manage individuals in the form of groups and tasks allotted to them.

Benefits of using Vtiger 7’s Groups functionality
To improve the efficiency of a group, Vtiger 7 is an effective tool. Its key feature allows to assign a record. Using the tool, you can assign a record to any individual or a group. After the successful assignation the record is available to all of the members of that group and they can perform key tasks on the record. This helps people to work in the form of teams and improve productivity.
If an individual from a group is unable to show up to the job, then there is a high chance that his or her tasks will be remained unfinished for that specific day. Using Vtiger 7 you can send the mail related to that tasks to the other members of that group, instructing them that anyone of the remaining group members can take the case.
Vtiger 7 allows to make groups on the following basis:
Users: All the users who are selected will become under the umbrella of one group.
Roles: By using this option all the users who are associated with a specific role are assigned to one group.
Roles and Subordinate: This features allow to select all the users associated with a role and all the subordinate of that role in one group
Group: Enhance your productivity by selecting a group or several groups to become a part of another group.
Effortless procedure to create a Group
The protocol of creating a group is simple yet exceptionally user friendly. Look for the menu button on top left of the screen named “App Switch”. Go to the settings and select User Management. Clicking the “Groups”, you’ll be presented by an “Add Group” button. A very neat yet effective table will provide you with several options. Fill and choose your desired features and it’s all ready to go.

Modify a Group for the best
Vtiger 7 let you revise a group’s settings according to the requirements or just in case less good options were set.
1. Open the list of the respective group and select the pencil icon. It’s “Edit” button.
2. Amend the fields according to your demand.
3. Save the changes.
Take a Group out when done
Is the motive of creating a group is completed? Task is accomplished? 3 simple steps let you delete the group and move on:
1. Click the recycle bin icon of the respective group.
2. Transfer the privileges of the group you are going to delete to another existing group.
3. Click save to finish the task.


