Business development is a tricky trade, and it just does not only include grabbing new opportunities but also the smooth ongoing of a project till closure. How to execute the phenomenon as professionally as possible is yet another liability.
Vtiger 7 approaches you with an exceptional hallmark, Forecast, which is extremely beneficial in predicting and planning the sales cycle from Pipeline to Closure. It predicts project fluctuations and relevant hazards and potential risks beforehand, saving a great deal of time, cost, and resources for the organization. Also, an organization’s past and current opportunities can also be managed with Forecast.
All you need to know about Forecast extension and where you can get it: vTiger Sale/Opportunity Forecasts
Note! This module is available only in Sales Professional and Ultimate edition.
What does Forecast Do?
Forecast predicts the prospects on the basis of the opportunities in hand of a Forecast Manager (A Sales Manager with a team at disposal) and his/her deputies. That takes in all of the opportunities that are supposed to be closed for the specific duration. Forecast Amounts are categorized as Pipeline, Best Case, Commit, Closed and mapped to Opportunities based on the sales stage.
Forecast is a complex tool; a manager can overview his team’s performance as well as fine-tune the responsibilities as per member’s performance. The regulations made by a Forecast Manager are not visible to the lower hierarchy and is only restricted to the manager and his superiors. The CRM’s default settings only allow a Forecast Manager to adjust Forecast amount of his direct subordinates. But the settings are customizable in Vtiger 7 as per company’s policy. The company can configure Forecast to allow managers to modify the opportunities of indirect subordinates.
Forecast Categories
Forecast’s categories consist of:
- Pipeline – containing amounts from all open opportunities.
- Best Case – comprises of amounts you are likely to close, closed/won opportunity amounts, and amounts in the Commit category.
- Closed – includes amounts for closed/won opportunities.
- Commit – those amounts that can be assured to close and closed/won opportunity.
Where and How to Begin
The first step in availing the features of Forecast is to enable the tool in Module Manager. It will be available under App Menu → Sales App → Forecast. To access the Forecast configuration and management section, you need to have Administrator privileges over the CRM. After the setup is complete, the non-admin staff will be able to access Forecast.
The Administrator and the users with admin rights will see the forecast details, where they can Proceed and Configure the Forecast module.
While the configuration is in process, the message “Forecast configuration is incomplete, please contact your Administrator” will be displayed to the users who try to access the Forecast.
A big blue button saying View Forecast is the sign of successful configuration. Now users can access the data in Forecast module in Vtiger 7.
Default view of Forecast module is summary view, where general information of opportunities is exhibited.
Forecast Settings
Use the Forecast Settings button on the top right corner in Forecast module to access the settings. There are 2 major sections of Forecast settings:
- Forecast Hierarchy
- Basic Configuration
Forecast Hierarchy
Company’s administrator and operators having admin privileges have the ability to manage the Forecast Hierarchy. A user who “Reports to” another user is considered as subordinate in the Forecast hierarchy. The Administrator is the super user who can view the forecasts and their related Opportunities of all subordinates. To design a Forecast Hierarchy, simply drag & drop the non-allocated users on to the Organization (Unassigned Users section is the root node of the system).
Basic Configuration
Like other extensions of Vtiger 7, Forecast is a complex tool. To perform basic configuration such as managing Forecast Period, Forecast Category, etc., you’ll need to visit the Basic Configuration tab of the module. Following customizations are available in this tab:
- Financial Year Starts: You can nominate the month and year to begin forecast tracking with this setting.
Note! The year is restricted from 2014 to 2020
- Forecast Period: To toggle the Forecast period format between monthly or quarterly basis as per your company’s requirements.
- Number of Periods: This field lets you set the number of time periods to view the forecast based on the Forecast period. For instance, if the company’s financial year begins from April and you have set Quarterly forecast for a period of 4, then you would see the following time period Q2 2014, Q3 2014, Q4 2014 and Q1 2015. Similarly, periods will be timed from Jan 2014 to June 2015, if the monthly forecast is set from January for next 18 months.
- Allow Adjustments on: This field works as failsafe for the Sales personnel. If someone at your sales team has over or undercharged an Opportunity, the Forecast manager can modify the set amount for the best.
Direct report’s Opportunity: If this option is selected, Forecast managers will only be able to adjust the Opportunity amounts of subordinates exactly beneath them.
Direct report’s and their subordinates Opportunity: Users will be capable of adjusting subordinates’ Opportunity amounts, either they are directly or indirectly inferior to them.
- Map Forecast Category to Sales Stage: With this bunch of preferences, You can group multiple sales stage in your cycle to a particular Category, the standard Category values are Pipeline, Best Case, Commit, and Closed. More values can be populated in this field via Picklist editor. Simply turning on the switch will allow making adjustments in the Forecast Category.
Note! Custom forecast categories can be added or removed as per company’s requirement.
Don’t forget to Save the configuration to apply changes to CRM, or view the Sales Forecast by clicking the Save and View Forecast button.
Forecast Data
After successfully completing the Forecast configuration and assigning of forecast managers and their subordinates, you are all set to kick off the forecast tracking according to the systemized time period. The Forecasts can be seen by navigating through the Sales menu.
Forecast data is divided into three parts depending upon their functions and impact:
- Forecast Hierarchy
- Forecast Summary
- Forecast Detailed information
Note! The Manager can only see his team members and Forecast data related to his subordinates in the Forecast View.
-
Forecast Hierarchy
The charted users as well as the administrator are listed in a sidebar on the left depending upon their sequence in hierarchy. The sole purpose of this arrangement is to have a clear view over the hierarchy, as well as comfortable navigation and adjustment of the forecast for different users. Simply click on any user’s name in the tree to contemplate his forecast data under Detailed information block.
For instance, in the following picture, Mark Hale is the forecast manager who is also included in the team as a member. But being the manager, he can view the forecast data of every member of his squad.
-
Forecast Summary
A brief fine abstract of the adjusted amount for a specific time period is displayed in Forecast Summary section. A team can only view its own summary.
-
Forecast Detailed Information
You can go through the detailed information of forecast category and forecast period relevant to a sales person for a specific duration in this section.
For example, in the above given screenshot, pressing the + button under sales agent column will show details of the users (in this case Mark Hale’s details), including team members and their forecast data.
When Mark Hale, the forecast manager, shall apply to view the team’s Opportunity amount, the total amount of Opportunity will be brought to him under his team’s section as the total of the Opportunity amount of the whole squad.
Adjust Forecast Amounts
If in any case, some amendments are required in a team member’s forecast amount, Vtiger 7 got you covered. With Forecast module, the Forecast manager can survey and revamp the amounts of any of the team member. If he reviews an Opportunity of the sales person to find out wrong amounts given, there would be no need to be confined to the specified quotes.
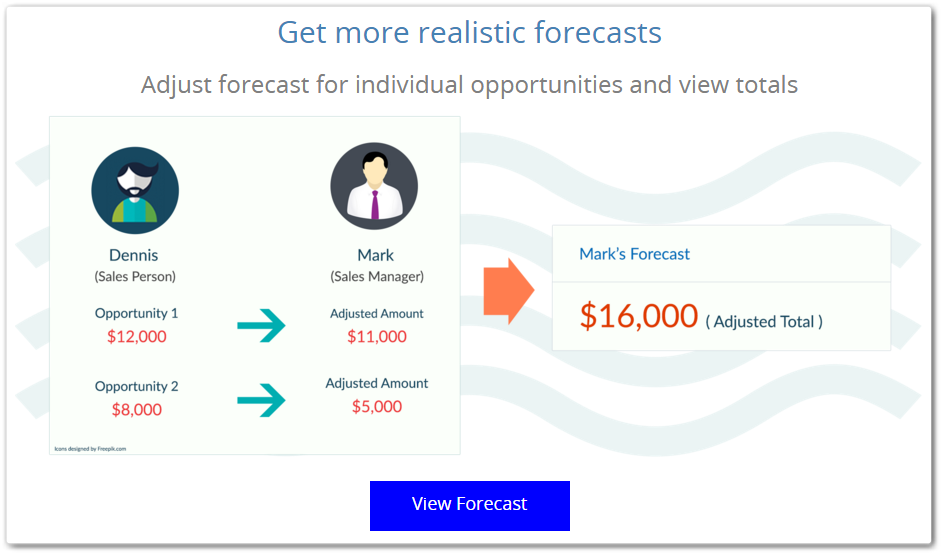
Take it from a sales rep’s point of view; consider that the agent is not sure about the percentage he is allowed for a specific opportunity, in order to grab it. So he makes an amount which the manager deems less appropriate. So he can offer another tender price to attract the Opportunity. Say the amount offered by the sales agent was $3800. A forecast manager can increase or decrease it if he considers the Forecast worthy of the offer.
Simply double tap on any of the estimate detailed information in the Forecast itemized data tab to adjust the forecast amount. In the shown popup, snap the edit button under Adjusted amount to change the sum. As a matter of course, the same price would show up in the Adjusted Amount until the manager manually input a new one in the field.
A forecast manager’s own forecast estimate page demonstrates the majority of his conjecture sums and his linked open door points of interest. At the point when a figure director sees a subordinate’s forecast details, the sum that would be visible to the user will be shown to him. Any conformity the supervisor makes on his forecast pages shall not be visible to the sales person. Rather, he will see the subordinate client’s conjectures and any changes he has made to his own deputies.
For example, if you’re an Executive manager of sales, on your own forecasts page, you might see a Q1 FY 2015 Closed Won forecast data of $3000 (including an adjustment you made) for one of your first-level subordinates, a sales manager. However, when you view the sales manager’s forecasts page, the Q1 FY 2015 Closed Won forecast data might be $2500 because it doesn’t include your adjustment.
Also, the history of the adjustments that had been made to the forecast in the past is available. To view the history, press the Red dot besides an amount in the Adjust Amount field.
Backup Forecast Data and Opportunities
Finally, you wouldn’t want to lose years of data and the hard work that was put into it. Keep the backup of your important forecast data and associated Opportunities outside the Vtiger 7 CRM. The data can be exported in .csv format. The records can be backed up in two different ways:
- Export Opportunity– It will back-up the Opportunity records connected to Forecast. The output will be saved as .csv file, that depicts all major details of the forecast excluding Team’s Forecast sum.
- Export Forecast– The Export Forecast button will transfer the forecast that exhibits the forecast data, forecast category amount, and the team forecast total. This is just as the Forecast detailed information outline block.

You can also export a specific opportunity record by clicking on the amount in the forecast category index and pressing the Export key.


